| Solitaire
Play in
Second World War at Sea
December 2012
The operational movement system in our Second
World War at Sea series employs a
thick fog of war. Players hide their ships
from the enemy by grouping them into generic-looking
fleets. They then pre-plot the movement of
those fleets on the operational map to reflect
the difficulties and uncertainties of reacting
to enemy fleet movements over large bodies
of water.
Given the fact that so much of SWWAS operational
play depends on not knowing where the enemy
really is or how friendly fleets will react,
some gamers might think it's not possible
to do it solitaire. But this isn't the case.
You can play almost any SWWAS scenario solitaire
through the simple use of random movement
tables for intercept fleets and random mission
assignment tables for air units.
Indeed, SWWAS solitaire play offers a whole
new level of challenge, requiring you to plan
the strategy of both sides at once. It also
lets you experiment fully with the capabilities
of both sides' units, so that you'll be better
able to use all the tools at your disposal
when facing a live opponent.
Tables
Random speed and direction tables are provided
at the end of this article. They require the
use of either a 20-sided die, or a 10-sided
die (included with our Granada
and Tears
of the Dragon games) rolled together
with a six-sided die. A roll of 1-3 on the
six-sider = 1-10 on the 10-sider; a roll of
4-6 on the 6-sider = 11-20 on the 10-sider.
| 
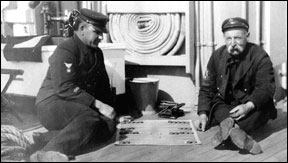
Early rounds of playtesting.
|
Setup
SWWAS solitaire setup is much the same as
with a two-player game. Determine the best
battle plan for each side, and divide ships
between fleets accordingly based on scenario
limits. Place all fleet counters in use on
the map with their numbered side up for easy
reference. Flip them to their generic sides
whenever they're spotted by enemy units, and
then flip them back to their numbered sides
when they evade contact. Air units of both
sides go in the ready boxes per scenario instructions.
Submarine flotillas can go on the map, since
you know where both sides' subs are. I use
the numbered sub counters from U.S. Navy
Plan Black to designate the locations
for each sides subs. You can use spare
multi-ship counters to designate the locations
of motor torpedo boat flotillas as well, placing
them on the map on each day's first night
turn and removing them on each day's first
daylight turn.
If a scenario allows you to place minefields
before game-start, wait to place them until
both sides have preplotted the movements of
all bombardment, transport and escort fleets
(see Fleets, below). Then make a list
of all zone boundaries at which each mine-capable
side would consider placing mines. Number
these zones, and roll randomly a number of
times equal to the number of minefields available.
Place a minefield in each zone whose number
you roll. If you roll the same zones
number multiple times, place multiple minefields
there subject to limits in the scenario instructions.
You can make a note of which boundaries contain
minefields, or if you're using a sheet of
plexiglas to cover the map, you can draw the
minefields on the zone boundaries using an
erasable pen.
Fleets
Preplot the movement of all bombardment,
transport and escort fleets normally. Then
designate which fleets will have intercept
missions.
During each turn, skip the Orders Phase (Phase
III), and roll for each fleet on the Fleet
Speed and Direction tables during the Naval
Movement Phase (Phase VI). You don't need
to roll on the Speed Table for fleets that
are making best speed for the enemy. Similarly,
you don't need to roll on the Direction Table
for an intercept fleet that's making for port
via the shortest possible route (abort missions
are preplotted).
Each result on the Direction Table tells
whether you can move a fleet in the desired
direction. The desired direction
is the actual direction the fleet would like
to move at the instant its moving.
For example, if a fleet wants to move directly
northwest from its current location this turn,
a result of desired direction
allows you to move the fleet directly northwest
at whatever speed the Speed Table says it
will move. If the fleet is trying to end up
in or move through a specific zone or zones
for the purpose of contacting or avoiding
an enemy fleet, a desired direction
result allows it to do so as long as the zone
or zones are within the fleets movement
range this turn.
A result of Left of or Right
of desired direction means the fleet
cant enter the zone(s) it wants to,
and follows a path from its starting hex that
aims left or right of the target zone at an
angle of less than 90 degrees. A result of
Left and away or Right
and away from desired direction means
the fleet moves away from its desired direction
of travel at an angle greater than 90 degrees.
Directly away from desired direction
is self-explanatory.
When moving in close proximity to enemy fleets,
it may be necessary to roll on the Direction
Table for each zone a fleet enters. Do so
or not as the situation dictates. In addition,
alternate moving both sides fleets
when they're in close proximity to each other
so its easy to keep track of fleets
that cross each others paths. Roll
for contact as normal.
Submarines
Submarine flotillas move on every even-numbered
turn. Subs can move a maximum of one zone
whenever they move, so roll on the Submarine
Movement Table to see if it moves or not,
and then on the Direction Table just as with
fleets.
Air Units
On the first daylight turn of each game day,
assign each air unit a mission for the entire
day. Check each air unit to see what type
it is, and then roll on the Air Unit Mission
Table corresponding to its unit type.
Units that receive CAP, Search, ASW or Sweep
missions go in the corresponding box on the
air unit card and stay there for the day.
Units that receive Naval or Land Strike missions
stay in the ready box until you decide to
use them. Write their missions normally during
the Air Unit Assignment Phase. If there's
enough daylight, or if they are night-strike
capable, they may fly more than one strike
mission per day as normal. If a roll gives
a unit a mission that makes no sense (for
example, ASW in a game with no enemy submarines),
reroll.
Combat
The air and naval combat systems in SWWAS
are very easy to use in solitaire play and
require no special rules.
That's it! Everything else is the same as
normal SWWAS play. Have fun playing SWWAS
solitaire!
Click here
to download the SWWAS Solitaire Tables.
Or
click here to see all our great Second
World War at Sea games.
|


