New Zealand Division:
Publisher’s Preview
by Mike Bennighof, Ph.D.
July 2022
 By the end of 1942, the 2nd New Zealand Division had seen several periods of intensive combat, and essentially lost one of its three infantry brigades in July 1942. The veteran division did not immediately join the pursuit of the defeated Axis army following the Battle of El Alamein, but soon went to the front with a British armored formation (usually either 4th Light Armoured Brigade or 9th Armoured Brigade) taking the place of the lost 4th New Zealand Infantry Brigade. By the end of 1942, the 2nd New Zealand Division had seen several periods of intensive combat, and essentially lost one of its three infantry brigades in July 1942. The veteran division did not immediately join the pursuit of the defeated Axis army following the Battle of El Alamein, but soon went to the front with a British armored formation (usually either 4th Light Armoured Brigade or 9th Armoured Brigade) taking the place of the lost 4th New Zealand Infantry Brigade.
The Kiwis skirmished with the Germans around El Agheila, on the road to Tripoli, and helped lead the pursuit across western Libya and into Tunisia. The New Zealanders took the lead in Eighth Army’s breakthrough of the Mareth Line fortifications in southern Tunisia, and in the rest of the campaign up to the liberation of Tunis itself in May 1943.
Panzer Grenadier: New Zealand Division is a Campaign Study, what we call our series of small books covering a specific battle or campaign at a tight focus, with scenarios and historical background all woven together to tell the story of the event and the armies who fought there. The book includes 10 new scenarios, organized into two chapters, each of those with a “battle game” that links the scenarios together so you can play through them and match your performance against your side’s broader operational goals.

Tougher than they look. Troops of the 6th New Zealand Infantry Brigade, 1943.
Unlike the other Campaign Studies released so far, New Zealand Division also includes pieces: the 88 die-cut and mounted New Zealand pieces that originally appeared in the long out-of-print Panzer Grenadier: Desert Rats. They’ve been in the back of our office for a while now (we used the other half of their sheet, which held Indian Army pieces, in the first edition of Panzer Grenadier: Africa Orientale Italiana) and they’re very fine pieces that needed to be used. A game, or even just a game piece, can never be happy unless a gamer plays with it.
The New Zealand Division was an infantry outfit, and that’s what the pieces reflect. New Zealand infantry is rated the same as other British Empire foot soldiers; they’re on the same Table of Organization, with relatively small platoons but a dozen of them per battalion rather than the nine platoons of almost everyone else’s battalions.
Panzer Grenadier tends to place the “hard” factors – firepower, range, movement – on the playing piece, and leave the soft factors off it. Those soft factors are what make the New Zealanders such a formidable fighting force. They have outstanding morale, equal to the best regular forces in Panzer Grenadier. They usually have an edge in initiative, and they have outstanding leadership.
The mix of leaders in Panzer Grenadier scenarios is crucial to the game system’s depiction of unit and overall army quality. Some nations are lacking in junior leaders because of a weak educational system or lack of a dedicated corps of professional junior officers and NCO’s. A leader is Panzer Grenadier is an exceptional individual; the number of officers in a unit does not indicate the number of leaders. A well-honed formation like 2nd New Zealand Division has plenty of leaders, they’re generally of good individual quality (with many leaders sporting skills to modify both the morale and the tactical performance of their troops), and they follow a bell curve distribution by rank, which means in game terms that New Zealand units have an easier time setting up a “chain activation” where many individual platoons get to move and/or fire at once, an enormous advantage in the game and one that reflects the battlefield advantages of a well-trained and well-experienced instrument of war.
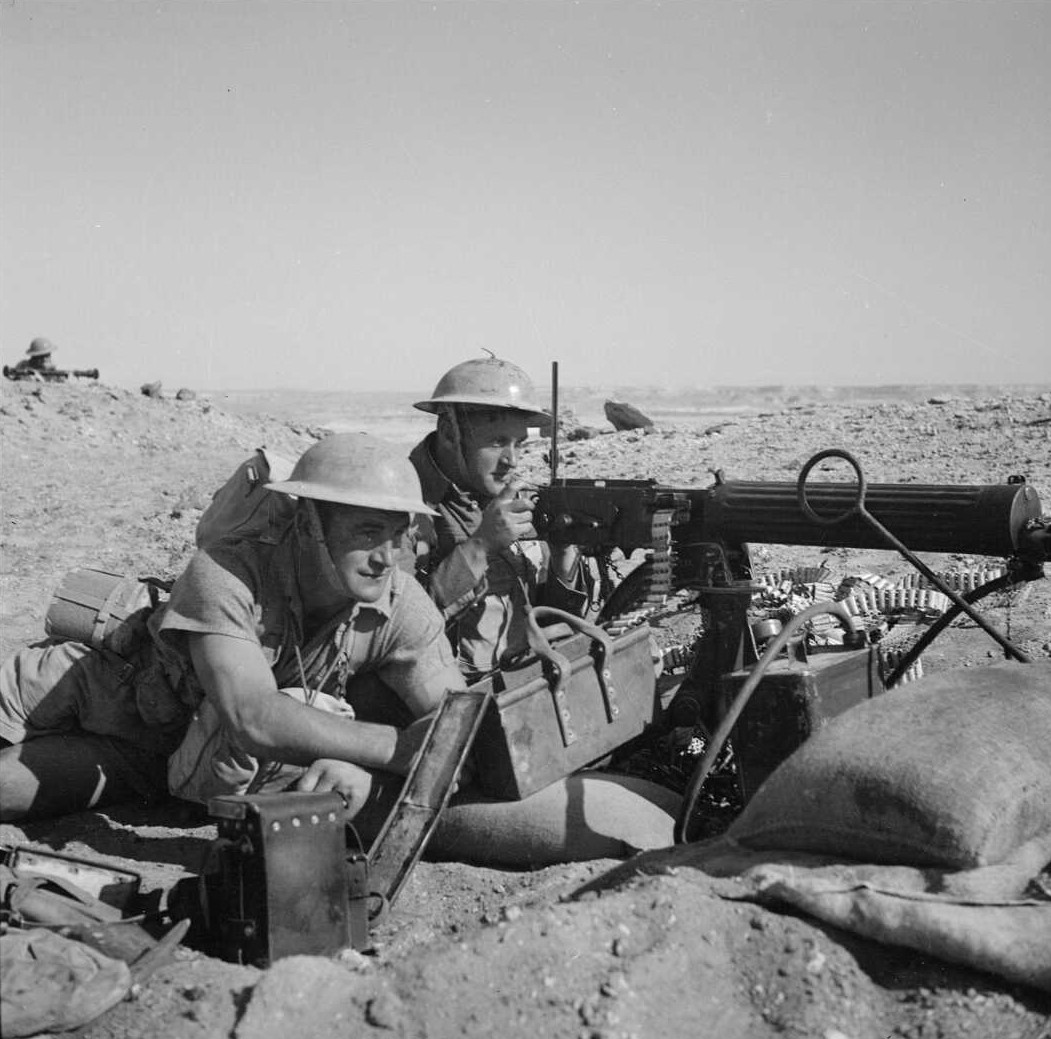
A Vickers gun and two soldiers of the 27th New Zealand Machine Gun Battalion.
The New Zealanders wield the same support weapons as the British: Vickers machine gun platoons, 3-inch mortars (a hybrid of the ubiquitous Brandt 81mm mortar and the Great War-era Stokes mortar), 2-pounder and 6-pounder anti-tank guns. Like British divisions, the New Zealand formation kept its machine guns in a separate battalion. In theory this would allow the division to concentrate all 48 machine guns at a single point for overwhelming fire, but in practice the battalion parceled its companies out to the infantry brigades which in turn assigned them to support the infantry battalions.
Where the 2nd New Zealand Division differed from other Empire formations was in its additional infantry battalion, giving it ten such instead of the usual nine (three each in three brigades). The 28th Maori Battalion was recruited from the islands’ indigenous Polynesian population, and gave the division a crack shock unit to throw into particularly tough situations. Just how tough the Maori were compared to paheka Kiwis is still argued 80 years later, but it would become the most-decorated battalion in New Zealand military history and had a formidable fighting reputation at the time.
The Maori appear in their own special color scheme; they have a higher proportion of automatic weapons than the line battalions and so their ratings are somewhat different than the other New Zealand infantry. We get the see the Maori in action in Tunisia; like other infantry battalions, it had only rifle platoon and no organic heavy machine-gun platoons (those, when attached, came from the divisional 27th Machine-Gun Battalion). But they are elite infantry, particularly formidable in close combat.
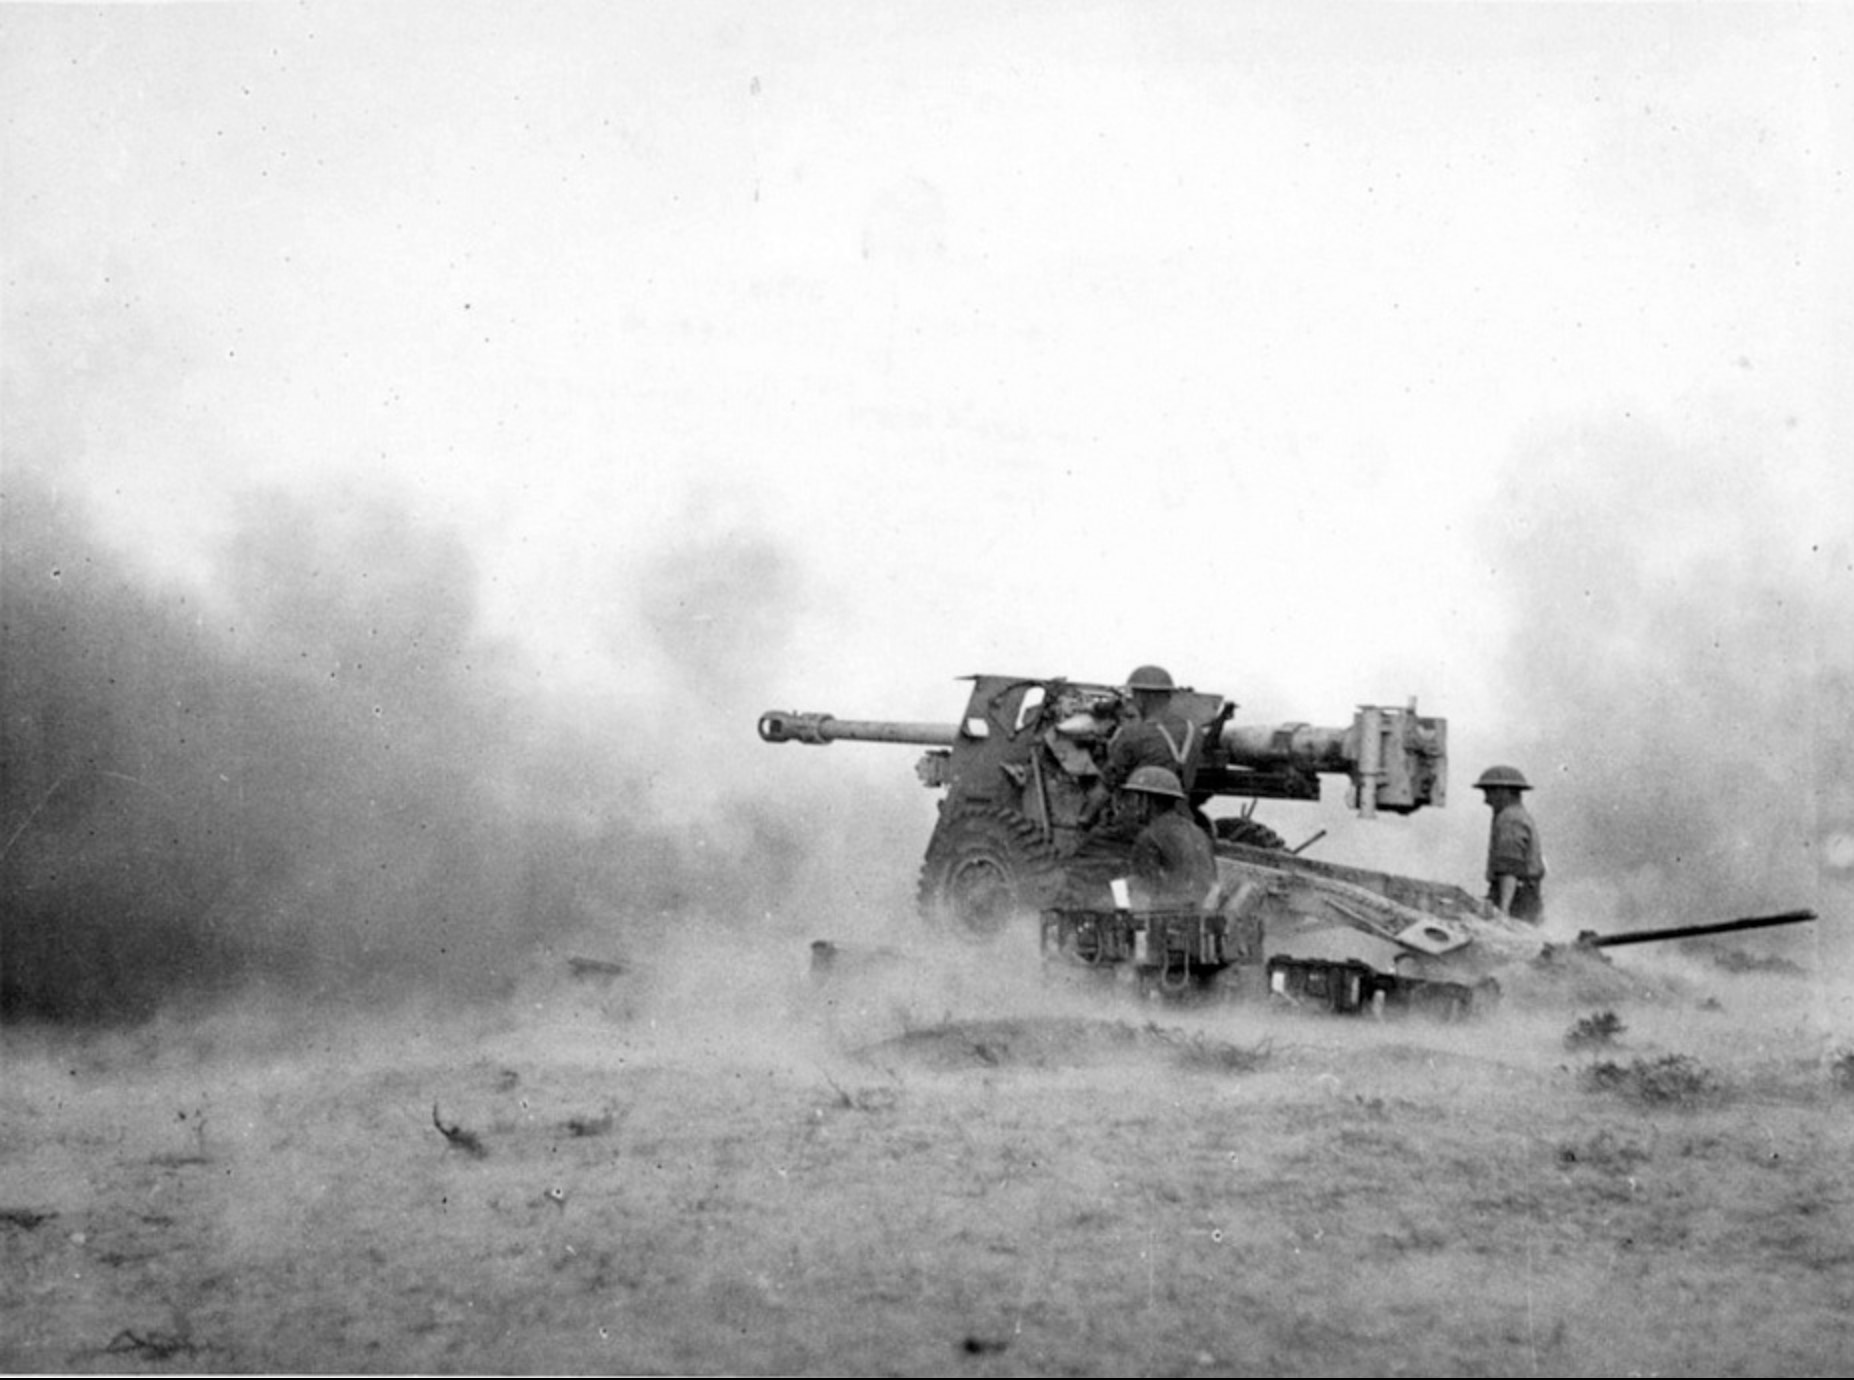
Gunners of 7th New Zealand Anti-Tank Regiment fire their 17/25-pdr anti-tank gun, deployed to slay the German Tiger tank.
The scenarios include a brief intro at El Agheila, and then follow the division in the battles for the Mareth Line (Operations Puglist and Supercharge, waged in March 1943) and the hard fighting at Enfidaville and Takrouna in April. The division by this point had just two infantry brigades, but considerable British tank support helped the Kiwis push through some rather stout German and Italian defenses.
The scenarios use the maps and pieces from Panzer Grenadier: An Army at Dawn, and a handful of scenarios draw some pieces (British Sherman tanks) from Liberation 1944. We have the usual historical background, and scenarios woven together to tell the story of this epic New Zealand achievement.
This is the sort of topic I want to see our Campaign Studies line tackling: tightly-focused on an intense situation, where the story-arc format using the scenarios to tell the story can really shine. We had the New Zealand pieces on hand, they’re really nice and didn’t deserve to be thrown out. I’m glad we were able to put them to such good use.
You can order New Zealand Division right here.
Sign up for our newsletter right here. Your info will never be sold or transferred; we'll just use it to update you on new games and new offers.
Mike Bennighof is president of Avalanche Press and holds a doctorate in history from Emory University. A Fulbright Scholar and NASA Journalist in Space finalist, he has published an unknowable number of books, games and articles on historical subjects.
He lives in Birmingham, Alabama with his wife, three children and his new puppy. He will never forget his dog, Leopold, Leopold knew the number.
Want to keep Daily Content free of third-party ads? You can send us some love (and cash) through this link right here.
|