| Bismarck Second Edition:
Scenarios, Stories and History, Part 3
By Mike Bennighof, Ph.D.
November 2023
 Our story began with: Our story began with:
• Part One
• Part Two
• Part Four
As the wargame market becomes flooded with new games, new editions of old games, plus rotting copies of old games rising from their cardboard graves to be sold on auction sites, every metric shows that each game is played just a few times. I decided that our games needed to stand out somehow, and so we’ve been emphasizing the historical content and the story.
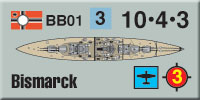
Second World War at Sea: Bismarck follows that model, going from 14 scenarios in the first edition to 46 in the second. They cover most surface operations in the North Atlantic, and we’ve looked at the 1939 scenario set and the Bismarck pursuit scenario set in prior installments. This time, we’ll take a look at the operations that came after the invasion of Norway, and before the famous first and last sortie of Bismarck herself.
German surface ships saw little action during most of 1940, as the battle cruisers needed repairs after battle damage in the Norwegian campaign, and other major units suffered mechanical breakdowns that also needed major overhauls. And so the section opens with mostly minor forces in action in the English Channel and the Western Approaches.
 Once the British knew that Operation Sea Lion, the planned invasion of Britain, had been postponed, the Royal Navy sent a battleship to shell Cherbourg in October 1940. Even as the British approached, German torpedo boats left the port to attack British shipping in the Channel. The forces never met, but that doesn’t stop us from including a battle scenario to go with the operational one. Once the British knew that Operation Sea Lion, the planned invasion of Britain, had been postponed, the Royal Navy sent a battleship to shell Cherbourg in October 1940. Even as the British approached, German torpedo boats left the port to attack British shipping in the Channel. The forces never met, but that doesn’t stop us from including a battle scenario to go with the operational one.
Later in October, the Germans probed into the Western Approaches with destroyers and torpedo boats. The British spotted a quartet of German destroyers and chased them with two cruisers and five destroyers of their own. German destroyers were notoriously unreliable, but this time mechanical breakdowns on two of the British ships saved the Germans.
We close out the Narrow Seas battles with another operation, this time from November 1940 in which a German destroyer flotilla tries to raid Channel shipping, but they’re intercepted by a British flotilla. The British outnumber the Germans five to three, but they’re led by Lord Louis Mountbatten which evens the odds somewhat.
 I could have added many more small scenarios from the Channel and surrounding areas; despite the nearby air bases, both sides made extensive use of their light forces here. But Bismarck is a game about capital ships, and that’s where the emphasis needs to lie. The Germans sent each of their operational heavy ships on raids into the North Atlantic (and some of them farther on from there), though they only rarely operated together. I could have added many more small scenarios from the Channel and surrounding areas; despite the nearby air bases, both sides made extensive use of their light forces here. But Bismarck is a game about capital ships, and that’s where the emphasis needs to lie. The Germans sent each of their operational heavy ships on raids into the North Atlantic (and some of them farther on from there), though they only rarely operated together.
The German long-range armored cruisers had been maximized for commerce warfare, and Admiral Scheer returned to that role in October 1940 after a lengthy refit. She ran into the armed merchant cruiser Jervis Bay, commanded by middle-aged reservist Capt. Edward Fogarty Fegen and escorting 38 merchant ships. Fegen had been set ashore by the Royal Navy during the Depression-era cutbacks in personnel, and recalled with the outbreak of war. When his moment came, he set his ship directly at the enemy. Jervis Bay had no chance of stopping the German ship; Fegen and 188 of his crew were killed in action, but 33 of his charges escaped. In our scenario, Jervis Bay has no real chance of success, only to inflict delay on Admiral Scheer. I found it necessary to include it.
 Germany had only three of the long-range armored cruisers. One (Graf Spee) had been lost in 1939, and another (Lützow) remained under repair from damage suffered in the invasion of Norway until March 1941. Once Admiral Scheer steamed on into the South Atlantic, the German fleet command believed an opportunity had been created for other surface raiders to operate in the North Atlantic. That could only be accomplished by committing conventional surface ships to the mission. Germany had only three of the long-range armored cruisers. One (Graf Spee) had been lost in 1939, and another (Lützow) remained under repair from damage suffered in the invasion of Norway until March 1941. Once Admiral Scheer steamed on into the South Atlantic, the German fleet command believed an opportunity had been created for other surface raiders to operate in the North Atlantic. That could only be accomplished by committing conventional surface ships to the mission.
The heavy cruiser Admiral Hipper made the first of these cruises in December 1940, during which she encountered troop convoy WS.5B. This was one of the few operational/battle scenario pairings we had in the game’s first edition, but those needed some fixes to the order of battle, and they also completely ignored the frantic British attempts to launch planes from their carriers (which were loaded as aircraft transports) to attack the German ship.
 In January 1941, the battle cruisers Scharnhorst and Gneisenau - finally repaired from damage suffered in the Norwegian campaign - set out to raid convoys and create a diversion to allow Admiral Scheer and Admiral Hipper to return home. They almost immediately stumbled on a British convoy heading from Sweden to Scotland, but thanks to non-existent cooperation between the German Navy and Air Force the big ships were not alerted to its presence. We of course have that scenario, plus the attack on Convoy HX.108 in the mid-Atlantic that the Germans aborted when they spotted a British battleship escort. In January 1941, the battle cruisers Scharnhorst and Gneisenau - finally repaired from damage suffered in the Norwegian campaign - set out to raid convoys and create a diversion to allow Admiral Scheer and Admiral Hipper to return home. They almost immediately stumbled on a British convoy heading from Sweden to Scotland, but thanks to non-existent cooperation between the German Navy and Air Force the big ships were not alerted to its presence. We of course have that scenario, plus the attack on Convoy HX.108 in the mid-Atlantic that the Germans aborted when they spotted a British battleship escort.
In both editions, I split the battle cruiser cruise (formally known as “Operation Berlin”) into two halves. The Germans actually steamed off the southern edge of the Bismarck map, deep into African waters. Bismarck was already a big game with two full-sized maps, and I didn’t want to add two more for just one scenario that wouldn’t see a lot of play due to its size and length. While I used the Second Edition to overturn a number of design decisions from the First, that wasn’t one of them. The game’s large enough as it is.
 Admiral Scheer did return home while the Royal Navy hunted the battle cruisers, but the British were not fooled by the diversion and left their cruiser patrol line in place. The German cruiser had to elude a pair of British light cruisers in the Denmark Strait, and we have a scenario where she has to fight them. Admiral Scheer did return home while the Royal Navy hunted the battle cruisers, but the British were not fooled by the diversion and left their cruiser patrol line in place. The German cruiser had to elude a pair of British light cruisers in the Denmark Strait, and we have a scenario where she has to fight them.
Seen in the context of these other operations, Bismarck’s sortie makes much more sense. The German naval command saw an opportunity to stretch British resources by deploying surface raiders, but only had a limited number of ships capable of undertaking the mission. Using them in that role justified their existence - always vital in the vicious struggle for approval between Nazi Germany’s feudal barons - and theoretically would expose the British capital ships sent to oppose them to attack by submarines and aircraft.
 Things fell apart, as the game shows as well, with the near-total lack of cooperation between Navy and Air Force. British bombers were allowed to take almost unchallenged target practice on the German warships in Brest, meaning that the battle cruisers could not support Bismarck when needed or carry on with more commerce-raiding missions. Things fell apart, as the game shows as well, with the near-total lack of cooperation between Navy and Air Force. British bombers were allowed to take almost unchallenged target practice on the German warships in Brest, meaning that the battle cruisers could not support Bismarck when needed or carry on with more commerce-raiding missions.
From the start, I wanted Bismarck, the game, to be more than just the story of Bismarck, the ship. The Hipper/Scheer/Scharnhorst scenarios show that the Germans had a coherent strategy behind their capital ship deployments; it probably wasn’t a good one and they didn’t execute it very well, but in this case they did have a method to their madness.
You can order Bismarck Playbook Edition right here.
Sign up for our newsletter right here. Your info will never be sold or transferred; we'll just use it to update you on new games and new offers.
Mike Bennighof is president of Avalanche Press and holds a doctorate in history from Emory University. A Fulbright Scholar and NASA Journalist in Space finalist, he has published a great many books, games and articles on historical subjects; people are saying that a few of them are actually good.
He lives in Birmingham, Alabama with his wife, three children, and new puppy. He misses his lizard-hunting Iron Dog, Leopold.
Want to keep Daily Content free of third-party ads? You can send us some love (and cash) through this link right here.
.
|