| Liberation 1944:
Scenario Preview, Part Six
By Mike Bennighof, Ph.D.
December 2024
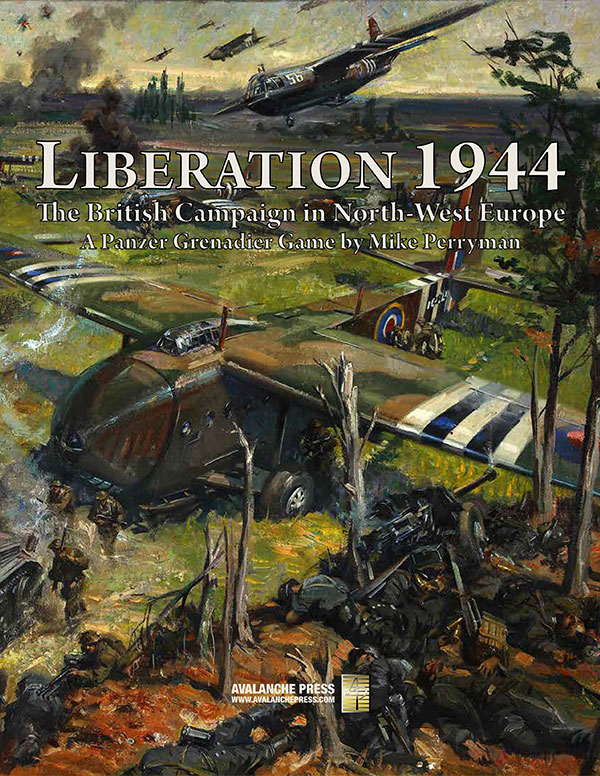 One of the central tenets of the Panzer Grenadier series is its expandability. We have “core” games that include everything you need to play, and then expansions that add more scenarios or pieces or sometimes even maps. That’s unique in the wargame world, but exactly how role-playing games are structured (Avalanche Press was once a role-playing publisher). One of the central tenets of the Panzer Grenadier series is its expandability. We have “core” games that include everything you need to play, and then expansions that add more scenarios or pieces or sometimes even maps. That’s unique in the wargame world, but exactly how role-playing games are structured (Avalanche Press was once a role-playing publisher).
Panzer Grenadier: Liberation 1944 hasn’t received a whole lot of expanding; there’s Britain’s Battle of the Bulge, a scenario book which sends British troops to fight in, you guessed it, the Battle of the Bulge (you’ll need Elsenborn Ridge to play the scenarios). And that’s it, so far. We’ll be addressing that in the future, as we delve into the roles of the Polish exiles and the Canadians, and the fighting at Hill 112, the Falaise Pocket and much more.
Liberation 1944 is just the start. But first, let’s look at the rest of Operation Bluecoat. You can see all of the previews here:
• Scenario Preview, Part One
• Scenario Preview, Part Two
• Scenario Preview, Part Three
• Scenario Preview, Part Four
• Scenario Preview, Part Five
• Scenario Preview, Part Six
• Scenario Preview, Part Seven
Chapter Eight
Operation Bluecoat: The Latter Days
The British VIII Corps made good progress in the first two days of Operation Bluecoat, the XXX Corps on its left barely got past its start lines, leaving VIII Corps badly exposed to German counter-attacks even with the fall of St. Martin des Besaces to 11th Armoured Division. Simply reinforcing the limited success of VIII Corps wasn’t an option, as the attack had taken place on the boundary of British Second Army and the American First Army. That meant that many of the roads heading southward were actually reserved for American use. Even the stated objective of the offensive, the key rail junction of Vire, lay on the American side of the dividing line.
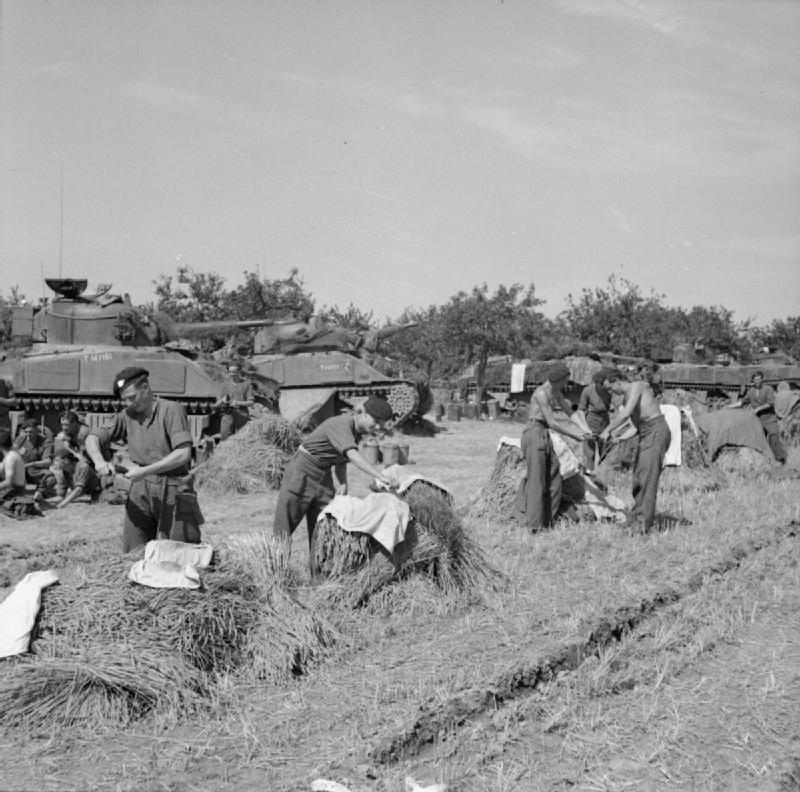
Tankers of 8th Armoured Brigade hang out their laundry. August 1944.
Like Operation Goodwood before it, the goals of Operation Bluecoat remain elusive decades later. Was it, as Allied ground forces commander Bernard Montgomery said later, intended to wear down German mobile forces and tie down reserves, to enable an American breakout to the west? Was it intended to capture Vire, an objective that Montgomery had already assigned to the Americans?
Whatever Montgomery’s reasoning, the offensive would continue, as the British divisions kept trying to make progress through the dense bocage terrain of hedgerows, ditches, and sunken roads - ready-made fortifications for the German defenders.
Scenario Thirty-Two
Quarry Hill
1 August 1944
 To ease the mounting pressure on Quarry Hill, Richard O’Connor of VIII Corps ordered the 9th Cameronians (Scottish Rifles) of 15th (Scottish) Division to clear Galet and La Mancelliere. With German forces attacking throughout the sector, a bren-mounted squadron of 15th Scottish Recon Regiment bolstered the tank support provided by 6th Guards Tank Brigade. Thanks to his heroic status from the North African campaign and subsequent daring escape from Italian captivity, O’Connor could not be fired, but his old friend Montgomery grew increasingly dissatisfied with his performance. To ease the mounting pressure on Quarry Hill, Richard O’Connor of VIII Corps ordered the 9th Cameronians (Scottish Rifles) of 15th (Scottish) Division to clear Galet and La Mancelliere. With German forces attacking throughout the sector, a bren-mounted squadron of 15th Scottish Recon Regiment bolstered the tank support provided by 6th Guards Tank Brigade. Thanks to his heroic status from the North African campaign and subsequent daring escape from Italian captivity, O’Connor could not be fired, but his old friend Montgomery grew increasingly dissatisfied with his performance.
Conclusion
The fighting on Quarry Hill raged for hours with the outcome in doubt, but neither side proved willing to feed in the reinforcements that might have brought them success. The British pushed forward despite their losses; the Germans delayed them for a while then gave way before incurring undue casualties themselves.
Notes
The Germans are very mobile this time; the Brits much less so but it’s a small battlefield so that’s far less of a disadvantage. Those German armored cars are fast, but they’ll melt away if they get too close to the plodding Churchills backing the British infantry.
Scenario Thirty-Three
Minden Day
1 August 1944
 Two months after the initial Allied landings, Maj. Gen. Edgar Feuchtinger still held command of the 21st Panzer Division, and still spent most of his days in sexual congress with his Brazilian stripper girlfriend. When the British attacked, he was once again sequestered in his requisitioned Norman manse, only leaving his bed that evening for a ceremony noting his promotion to lieutenant general. Meanwhile, he left to his underlings the conduct of any counterattacks by his division and the 13 operational Tiger tanks of the attached of 503rd Heavy Tank Detachment. “As I could not stop this senseless attack,” he told one of his aides, “it’s in the interest of my men to obey.” Two months after the initial Allied landings, Maj. Gen. Edgar Feuchtinger still held command of the 21st Panzer Division, and still spent most of his days in sexual congress with his Brazilian stripper girlfriend. When the British attacked, he was once again sequestered in his requisitioned Norman manse, only leaving his bed that evening for a ceremony noting his promotion to lieutenant general. Meanwhile, he left to his underlings the conduct of any counterattacks by his division and the 13 operational Tiger tanks of the attached of 503rd Heavy Tank Detachment. “As I could not stop this senseless attack,” he told one of his aides, “it’s in the interest of my men to obey.”
Conclusion
The fighting raged around Quarry Hill from the morning on, with the Germans finally forcing a gap between the 7th Seaforth Highlanders and the Royal Scots sometime after noon. The Germans committed more men and machines to exploit this success while the British sent for the 6th Kings Own Scottish Borderers to block the flood. The Borderers had been given red roses by their color-sergeants to wear on their helmets to remember the Battle of Minden on this day in 1759. They stopped just long enough to attach the fresh roses before counterattacking and bringing the German advance to a halt despite losing their commander. The Germans regrouped and tried again but heavy artillery fire and a flight of rocket-firing Typhoons convinced them they'd had enough.
Notes
This time the Germans get to go on the attack, with armor support including Tiger tanks plus the rocket-firing Maultier. The British eventually get some tanks of their own, leading to a slugfest between slow-moving thick-skinned Tigers and slow-moving thick-skinned Churchills.
Scenario Thirty-Four
Hill 361
1 August 1944
.jpg) While two battalions of the British 129th Infantry Brigade advanced through the Bois du Homme towards Hill 361, the 5th Wiltshires skirted the woods to the east and positioned themselves below the enemy before encountering them. German records are not clear if the infantry component of the defending forces hailed from the 326th Infantry Division or the arriving 21st Panzer Division, but the Tiger tanks definitely belonged to the 503rd Heavy Panzer Detachment. While two battalions of the British 129th Infantry Brigade advanced through the Bois du Homme towards Hill 361, the 5th Wiltshires skirted the woods to the east and positioned themselves below the enemy before encountering them. German records are not clear if the infantry component of the defending forces hailed from the 326th Infantry Division or the arriving 21st Panzer Division, but the Tiger tanks definitely belonged to the 503rd Heavy Panzer Detachment.
Conclusion
The Wiltshires took Hill 361 relatively quickly despite stout opposition. The Tommies claimed to have destroyed one Tiger tank while they found two more bogged down and abandoned. The War Diary of the 503rd Heavy Panzer makes no mention of losses for the day, but during this time period their reporting was spotty at best.
Notes
The British are back on the attack, with a little armored support including a Firefly to tackle a stout German defense backed by Tiger tanks. Fortunately, there’s heavy mud that can mire the Tigers but not the nimble Shermans supporting the Brits.
Scenario Thirty-Five
Battle Group Paetsch
2 August 1944
 The 11th Armoured Division had ripped a hole in the German line that threatened to unhinge the whole front. The II SS Panzer Corps moved forward to stabilize the defenders’ position. On the previous day only the under-strength 21st Panzer Division put up a serious effort to contest the Allied advance, and they slowed but did not stop the British in heavy fighting. Staunch Nazi Otto Paetsch, a party militiaman since 1931, would try to halt the British advance. The 11th Armoured Division had ripped a hole in the German line that threatened to unhinge the whole front. The II SS Panzer Corps moved forward to stabilize the defenders’ position. On the previous day only the under-strength 21st Panzer Division put up a serious effort to contest the Allied advance, and they slowed but did not stop the British in heavy fighting. Staunch Nazi Otto Paetsch, a party militiaman since 1931, would try to halt the British advance.
Conclusion
The 4th Dorsets left before midnight and entered Jurques unopposed. They regrouped and ran a gauntlet of fire, but secured La Bigne around 1600. The Hampshires followed them into Jurques with the intention of exploiting southward but the newly-arrived panzer grenadiers on Hill 301 proved too much to overcome, even with the RAF’s help.
Notes
This is a big scenario, a mighty clash of tank-infantry forces with the well-supported British fighting to smash through the Waffen SS. SS-smashing is always a good thing.
Scenario Thirty-Six
For Want of a Firefly
4 August 1944
 On the previous day, Battle Group Weiss destroyed a number of Cromwells on their journey from Vire to Hill 119. Today the seven Tigers of Hans Weiss’s SS militia battle group split their firepower between La Bistiere and Hill 119, posing an unwanted threat to 11th Armoured Division’s tactical headquarters in Le Reculy. The Northampton Yeomanry had been rebuffed in their first effort to take La Bistiere due to a lack of infantry. When the 1st Norfolks arrived, they joined forces with the recon tanks and started a serious push south. On the previous day, Battle Group Weiss destroyed a number of Cromwells on their journey from Vire to Hill 119. Today the seven Tigers of Hans Weiss’s SS militia battle group split their firepower between La Bistiere and Hill 119, posing an unwanted threat to 11th Armoured Division’s tactical headquarters in Le Reculy. The Northampton Yeomanry had been rebuffed in their first effort to take La Bistiere due to a lack of infantry. When the 1st Norfolks arrived, they joined forces with the recon tanks and started a serious push south.
Conclusion
Inconclusive fighting lasted all day but the British infantry made it impractical for the Tigers to spend the night on Hill 119. As darkness fell the heavy panzers worked their way back to join the panzer grenadier company holding out in La Bistiere and then to Vire. After the battle the British tankers complained bitterly that their armoured recon had only Cromwells and none of the Tiger-killing Fireflies fielded by the armor battalions -- they lost 47 tanks in 48 hours to Battle Group Weiss in exchange for a single Tiger destroyed.
Notes
This is a relatively small scenario, with a relatively great number of Cromwells and British infantry platoons trying to overwhelm a small German force built around two platoons of Tigers. Flank shots matter!
Scenario Thirty-Seven
St.-Jean-le-Blanc
5 August 1944
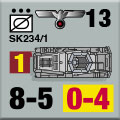 While the rest of the 129th Infantry Brigade advanced on the prize of Mont Pinçon (the highest point in Normandy), the 4th Wiltshires marched to secure St.-Jean-le-Blanc to provide a cushion against enemy attacks from the south. They left La Forte Ecuelle at 0800 and encountered little difficulty until 1400 when they found the bridge over the Druance outside of Escores destroyed. The stream was small and C Company waded across but steep banks meant the supporting armor had to be left behind until the sappers could throw a bridge across it. While the rest of the 129th Infantry Brigade advanced on the prize of Mont Pinçon (the highest point in Normandy), the 4th Wiltshires marched to secure St.-Jean-le-Blanc to provide a cushion against enemy attacks from the south. They left La Forte Ecuelle at 0800 and encountered little difficulty until 1400 when they found the bridge over the Druance outside of Escores destroyed. The stream was small and C Company waded across but steep banks meant the supporting armor had to be left behind until the sappers could throw a bridge across it.
Conclusion
By 1600 the stream had been bridged and the Shermans plunged ahead to do what they could for the infantry. Unfortunately for them, it wasn't enough as the enemy refused to be driven from their positions. That night the Wiltshires received orders to withdraw as Mont Pinçon was the objective and not St.-Jean-le-Blanc. They paid for the unnecessary position with 22 dead and 39 wounded.
Notes
Like a few other first edition scenarios, this one had some serious directional problems. With those fixed, the Germans are defending a long, narrow segment of turf against a British infantry force that eventually gets a little armored backup.
Scenario Thirty-Eight
Black Sunday
6 August 1944
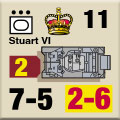 To protect their exposed left flank, the British VIII Corps needed to secure the small commune of Lassy, in the rugged yet beautiful “Norman Switzerland.” The three battalions of the 46th “Highland” Infantry Brigade drew the assignment, backed by infantry-support tanks. On the other side of the line, worn-down German armored units forbidden to retreat by their increasingly-insane supreme commander prepared to meet them. To protect their exposed left flank, the British VIII Corps needed to secure the small commune of Lassy, in the rugged yet beautiful “Norman Switzerland.” The three battalions of the 46th “Highland” Infantry Brigade drew the assignment, backed by infantry-support tanks. On the other side of the line, worn-down German armored units forbidden to retreat by their increasingly-insane supreme commander prepared to meet them.
Conclusion
Due to the heavy losses suffered by the Cameronians in this attack, the survivors remembered the day as “Black Sunday.” The Glasgow Highlanders secured their initial target with light casualties but when the 7th Seaforths passed through them they came under heavy fire. The company was soon reduced to one officer and 40 men and the accompanying battalion commander fell mortally wounded. The two following companies both lost their commanders among the many casualties, and the Coldstream Guards lost a number of tanks. The attack failed.
Notes
The British must once again advance, following their slow-moving supporting armor into the teeth of German defenders lavishly equipped with support weaponry. They have a strong edge in numbers, and they’re going to need them.
Scenario Thirty-Nine
Estry
8 August 1944
 Even though their strength steadily dwindled through the dispatch of reinforcements elsewhere and their own losses, the Germans stubbornly clung to their positions around Estry, just west of Lassy. Scottish infantry supported by Guards tanks made repeated attacks, but had difficulties with the area’s sunken roads and with the carefully-camouflaged tanks deployed by the Armed SS. To make up for the losses of Churchill heavy tanks, British VIII Corps scrounged up some of the “Funnies” from 79th Armoured Division to assist in one more assault by the 46th “Highland” Infantry Brigade. Even though their strength steadily dwindled through the dispatch of reinforcements elsewhere and their own losses, the Germans stubbornly clung to their positions around Estry, just west of Lassy. Scottish infantry supported by Guards tanks made repeated attacks, but had difficulties with the area’s sunken roads and with the carefully-camouflaged tanks deployed by the Armed SS. To make up for the losses of Churchill heavy tanks, British VIII Corps scrounged up some of the “Funnies” from 79th Armoured Division to assist in one more assault by the 46th “Highland” Infantry Brigade.
Conclusion
For the first hour the British slowly pushed the fanatic SS militiamen backwards. That was the good news. The textbook German counterattack led by a hand full of panzers then threw them back to their own starting line. By 1500 it was oblivious that today would be no different than the proceeding ones and a truce was arranged to gather and tend the wounded.
Notes
Another large scenario, with a massive force of British infantry backed by all manner of “funny” tanks (flame-throwing tanks, mine-clearing tanks, giant-bomb-tossing tanks) crashing into a well-fortified line held by the Armed SS militia and backed by tanks. The Brits also bring lots of artillery, lots of airplanes, and stout morale.
And that’s all for Chapter Six. Next time, it’s Chapter Seven.
You can order Liberation 1944 right here.
British Bulge Package
Liberation 1944 (Playbook ed)
Elsenborn Ridge
Britain's Battle of the Bulge
Retail Price: $190.97
Package Price: $150
Gold Club Price: $120
You can experience the British Bulge right here.
Sign up for our newsletter right here. Your info will never be sold or transferred; we'll just use it to update you on new games and new offers.
Mike Bennighof is president of Avalanche Press and holds a doctorate in history from Emory University. A Fulbright Scholar and NASA Journalist in Space finalist, he has published a great many books, games and articles on historical subjects; people are saying that some of them are actually good.
He lives in Birmingham, Alabama with his wife, three children, and new puppy. He misses his lizard-hunting Iron Dog, Leopold.
Daily Content includes no AI-generated content or third-party ads. We work hard to keep it that way, and that’s a lot of work. You can help us keep things that way with your gift through this link right here. |
