| Liberation 1944:
Scenario Preview, Part Four
By Mike Bennighof, Ph.D.
November 2024
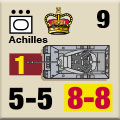
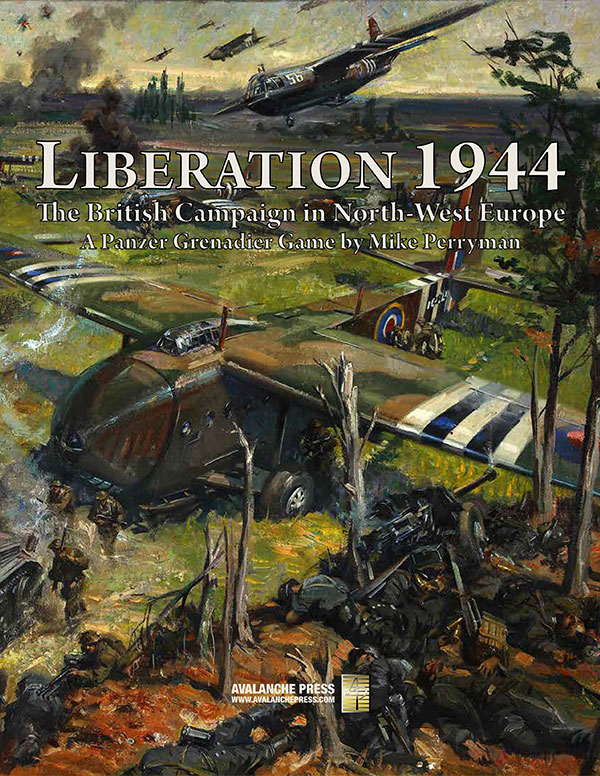 One of the first things you notice upon opening Panzer Grenadier: Liberation 1944 are the British Army’s tanks. Rows upon rows of Shermans and Cromwells and Fireflies and even some Churchills and Stuarts, And the weird ones like the Crocodile and the AVRE. One of the first things you notice upon opening Panzer Grenadier: Liberation 1944 are the British Army’s tanks. Rows upon rows of Shermans and Cromwells and Fireflies and even some Churchills and Stuarts, And the weird ones like the Crocodile and the AVRE.
And now in the fourth chapter, you get to send those serried ranks of cleaming armor into battle. The British plan for Operation Goodwood specifically mentioned the “tank country” to be found south-east of Caen. They foresaw a mighty tank battle on the green fields of France, and the Germans were ready to oblige them.
So, let’s have a look at another large chapter. You can see all of the previews here:
• Scenario Preview, Part One
• Scenario Preview, Part Two
• Scenario Preview, Part Three
• Scenario Preview, Part Four
• Scenario Preview, Part Five
• Scenario Preview, Part Six
• Scenario Preview, Part Seven
Chapter Four
Operation Goodwood
After a pause in the Allied buildup caused by a powerful storm, the British Second Army began a steady campaign to isolate and encircle the German forces defending the ancient city of Caen. In late June, Operation Epsom kicked off to the west of the city, aimed at encircling the objective. The Germans held on, but only by committing all of their mobile reserves.

Third Division infantrymen mount Shermans of the Staffordshire Yeomanry to begin Operation Goodwood. 18 July 1944.
Operation Goodwood would repeat the maneuver, this time from the eastern side of the city. At the same time, the American First Army would launch its Operation Cobra, on the western end of the Allied beachhead. Bernard Montgomery, commanding Allied ground forces, then wavered on his directives for Second Army. Contradictory orders called it a breakthrough attempt and a move to grind down the German armored strength through attrition. Unkind observers, then and later, would suggest that Montgomery instead prepared to claim a success, whatever the operation’s outcome.
On the ground, the troops and their commanders very clearly thought they were seeking to smash through the German defenses. The British now had three armoured divisions ashore, ready for action, and to pave the way the Royal Air Force’s Bomber Command had lent every plane it possessed in the largest airstrike ever delivered up to that point. After the bombers had thoroughly pulverized the German front line, a heavy artillery barrage would follow. Then the tanks would advance.
Scenario Eighteen
Southbound Again
18 July 1944
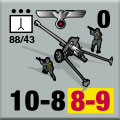 While the British artillery barrage crept forward, the lead elements of 11th Armoured Division followed, the engineers steadily marking lanes through the thick German minefields. When the bombardment ceased, the tanks and infantry rolled forward, finding a great many Germans wandering about dazed and confused. But some of the others could still fight. While the British artillery barrage crept forward, the lead elements of 11th Armoured Division followed, the engineers steadily marking lanes through the thick German minefields. When the bombardment ceased, the tanks and infantry rolled forward, finding a great many Germans wandering about dazed and confused. But some of the others could still fight.
Conclusion
Things started out well for the “Charging Bull” division. The Germans offered little resistance and retreated with some encouragement from the advancing Brits. British heavy bombers had leveled Cuverville earlier in the morning, destroying the anti-tank unit stationed there and scattering the other defenders. It too soon fell. However, the German panzer grenadiers soon rallied and stopped the advance short of Démouville.
Notes
The Brits are on the advance, with a powerful mixed tank-infantry force. They have numbers and artillery; the Germans will need to hide in the rubble of what once were French towns and fight from there.
Scenario Nineteen
Second Echelon
18 July 1944
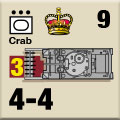 The British enjoyed marked success in the opening of Operation Goodwood. But behind the first line of German defenses, tank crews madly cleaned the impacted soil out of gun barrels and engine spaces, anti-tank crews righted their damaged weapons, and surviving infantrymen congratulated themselves on their stout Fuchslöcher. The British forward elements had been told to expect no organized resistance, but not for the first or last time in this war, planners had over-estimated the effects of carpet bombing. The British enjoyed marked success in the opening of Operation Goodwood. But behind the first line of German defenses, tank crews madly cleaned the impacted soil out of gun barrels and engine spaces, anti-tank crews righted their damaged weapons, and surviving infantrymen congratulated themselves on their stout Fuchslöcher. The British forward elements had been told to expect no organized resistance, but not for the first or last time in this war, planners had over-estimated the effects of carpet bombing.
Conclusion
The counterattack caught the two leading British armoured regiments (battalions) without much infantry support. They quickly lost over 40 tanks apiece, and 11th Armoured Division lost 126 in total, over half of those with which it had started the morning advance. BBC personnel embedded with the Fife & Forfar Yeomanry forwarded their radio call for artillery support when all the command tanks had been destroyed.
Notes
The British are still on the attack, this time with a badly unbalanced force consisting mostly of Sherman tanks. That’s still a lot of firepower, and they get a massive dollop of airpower on top of it, but the German anti-tank defenses include an actual expert, Alfred Becker, who’s skilled enough to actually rate his own special game rule.
Scenario Twenty
Charging Bull
18 July 1944
 On the right flank of the British armored advance, the 3rd Royal Tank Regiment (British parlance for a battalion) moved quickly forward. A railway embankment separated them from the neighboring Fife & Forfar Yeomanry, creating in effect a completely isolated battlefield as the British tankers met their first considerable opposition at Grentheville. Unlike the experienced Desert Rats fighting on their left flank, which formed combined-arms teams for the advance, in its first commitment to large-scale combat the 11th Armoured Division left its infantry brigade trailing behind the tanks, which were accompanied only by the rifle companies of the 29th Armoured Brigade’s motor battalion. On the right flank of the British armored advance, the 3rd Royal Tank Regiment (British parlance for a battalion) moved quickly forward. A railway embankment separated them from the neighboring Fife & Forfar Yeomanry, creating in effect a completely isolated battlefield as the British tankers met their first considerable opposition at Grentheville. Unlike the experienced Desert Rats fighting on their left flank, which formed combined-arms teams for the advance, in its first commitment to large-scale combat the 11th Armoured Division left its infantry brigade trailing behind the tanks, which were accompanied only by the rifle companies of the 29th Armoured Brigade’s motor battalion.
Conclusion
The 3rd Royal Tank Regiment, accompanied only by G Company of 8th Rifle Brigade, penetrated the German first line before the defenders recovered from the bombardment.
Resistance stiffened at Grentheville, and the British could not force their enemies from either Bras or Hubert Folie and soon found themselves hard-pressed to hold on to their gains. Even the infantry that did accompany the tanks made little impact; the brigade’s motor battalion (equipped with American-made M3 halftracks) lost four men during the course of the day, while 3rd Tanks alone lost over 40 Shermans.
Notes
The British tanks continue to roll, but this time the Germans add some 88mm batteries to Major Becker’s expert tank destroyers. The Brits have numbers and morale on their side, and constant air cover, so this could be a long day for Alfred and his friends.
Scenario Twenty-One
Stout Resistance at Emieville
18 July 1944
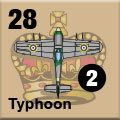 To anchor the left flank of the “armoured corridor” at the heart of Operation Goodwood, the British 3rd Infantry Division would secure Troarn to the east and rapidly push southward at the same time. Before the attack stepped off, Field Marshal Erwin Rommel helpfully ordered the 100th Panzer Regiment into the front lines at Sannerville (1.5 miles west of this penetration) over the division command’s objections. Earlier in the morning a strike by British heavy bombers left less than 10 of the 40 or more tanks stationed near Troarn fit for duty. When the attack came, they could do little but join the panzer grenadiers at Emieville. To anchor the left flank of the “armoured corridor” at the heart of Operation Goodwood, the British 3rd Infantry Division would secure Troarn to the east and rapidly push southward at the same time. Before the attack stepped off, Field Marshal Erwin Rommel helpfully ordered the 100th Panzer Regiment into the front lines at Sannerville (1.5 miles west of this penetration) over the division command’s objections. Earlier in the morning a strike by British heavy bombers left less than 10 of the 40 or more tanks stationed near Troarn fit for duty. When the attack came, they could do little but join the panzer grenadiers at Emieville.
Conclusion
To compensate for their manpower shortage the British masked Troarn rather than assaulting it, saving untold casualties. This allowed the bulk of the division to concentrate on the southward drive. It still wasn’t enough this day as the panzer grenadiers could not be driven from Emieville.
Notes
The Germans have Alfred Becker and his scratch-built tank destroyers, but this time the British have not only morale and airpower, they have soaring initiative, powerful artillery and best of all Crocodiles. Flame-spewing Churchill tanks, and they have a lot of them. Plus, the Sherman Firefly. It’s a black day for the German Army, and that’s always a good thing.
Scenario Twenty-Two
The Capture of Bras
19 July 1944
 Even though 11th Armoured Division had lost over half its tanks in the previous day’s attacks, the offensive would continue. The division’s forward elements, still drawn solely from the division’s armoured brigade, would secure Bras and the surrounding high ground, then seize Herbert Folie. These two towns had withstood all British assaults on the previous day. At 1625 the 2nd Northampton Yeomanry, the divisional recon unit tasked with pointing the way for the rest of the attackers, marched forward and promptly became lost. The 3rd Royal Tank Regiment and the 29th Armoured Brigade’s motor battalion would find the enemy on their own. Even though 11th Armoured Division had lost over half its tanks in the previous day’s attacks, the offensive would continue. The division’s forward elements, still drawn solely from the division’s armoured brigade, would secure Bras and the surrounding high ground, then seize Herbert Folie. These two towns had withstood all British assaults on the previous day. At 1625 the 2nd Northampton Yeomanry, the divisional recon unit tasked with pointing the way for the rest of the attackers, marched forward and promptly became lost. The 3rd Royal Tank Regiment and the 29th Armoured Brigade’s motor battalion would find the enemy on their own.
Conclusion
VIII Corps’ war diary noted, regarding the capture of Bras: “This little action was not only of textbook perfection, but the prize thereby won was of utmost importance to the Corps.” Apparently the lead element of your force getting lost can be overlooked if you win your objectives. By 2115 that evening Hubert Folie hosted new occupants.
Notes
Yes, the Waffen SS are here and they have Tiger tanks. But the British have the Firefly, and stiff-upper-lip morale to carry the day (they’ll need it, since they have no airplanes to help out this time).
Scenario Twenty-Three
Beyond Fours
19 July 1944
 The initial British position on the eastern bank of the Orne River did not provide enough room for 7th Armoured Division to assemble. The Desert Rats formed up on the opposite side, and crossed on Bailey bridges after the 11th Armoured Division had advanced far enough to vacate adequate assembly areas. That transfer over the Orne River lasted until 0430 in the morning. The division formed up around Grentheville from which it would attack Bourguébus Ridge in conjunction with 11th Armoured Division’s attack on Bras. Before attacking Bourgébus, they would first have to seize Fours and Soliers. The initial British position on the eastern bank of the Orne River did not provide enough room for 7th Armoured Division to assemble. The Desert Rats formed up on the opposite side, and crossed on Bailey bridges after the 11th Armoured Division had advanced far enough to vacate adequate assembly areas. That transfer over the Orne River lasted until 0430 in the morning. The division formed up around Grentheville from which it would attack Bourguébus Ridge in conjunction with 11th Armoured Division’s attack on Bras. Before attacking Bourgébus, they would first have to seize Fours and Soliers.
Conclusion
The 5th Royal Tank Regiment lacked the strength to subdue both villages, so they focused their attention on driving through Soliers to reach Bourgebus. This left the 1st Royal Tank Regiment to attack Fours, which they quickly captured after driving out the occupying Germans. The 1RTR continued advancing to secure their sister regiment’s flank but suffered a substantial counterattack of their own. In inconclusive fighting the British failed to keep up the advance but managed to occupy the Germans’ attention, preventing them from interfering at Bourguebus.
Notes
All of these scenarios have had at least a few tanks on each side, but this one’s a straight-up more or less even tank battle. The Cromwells and Panzer IV’s are fairly evenly matched, and the Brits have a nice contingent of Fireflies to handle the Panthers and Tigers. The German edge in foot soldiers may determine the day, as the Brits have to capture towns (at least they have good mobility).
Scenario Twenty-Four
Frontal Assault at Troarn
19 July 1944
 The armor-supported advance of the British 3rd Infantry Division against Emieville left its left flank open to counter-attack by the German armor around Troarn. Sir John Crocker, commanding the British I Corps, had at first masked the village rather than engage in bloody combat. With the division engaged in tough combat at Emieville, “Honest John” broadened the attack to include Troarn and prevent the Germans there from reinforcing Emieville. The armor-supported advance of the British 3rd Infantry Division against Emieville left its left flank open to counter-attack by the German armor around Troarn. Sir John Crocker, commanding the British I Corps, had at first masked the village rather than engage in bloody combat. With the division engaged in tough combat at Emieville, “Honest John” broadened the attack to include Troarn and prevent the Germans there from reinforcing Emieville.
Conclusion
The German defenders turned back the first attempt by the 1st King’s Own Scottish Borderers. The 2nd Royal Ulster Rifles tried in the second wave, suffering a similar result. The Germans remained in control of the town in “especially bitter fighting.”
Notes
This is a relatively small scenario, with a lot of troops in a very small place. The British are once again on the attack, but they’re going to have to make their gains with infantry and only a smidgen of tank support. They do have airplanes and artillery, but the Germans are well-prepared and well-supplied with support weapons. Even so, don’t bet against the Scots and Irish.
Scenario Twenty-Five
Cymru am Byth
19 July 1944
 The capture of Cagny, on the eastern edge of the Operation Goodwood “armored corridor,” still did not unhinge the German positions, as the defenders fell back a few hundred meters to the south. By late afternoon on the 19th, the Guards Armoured Division’s lack of progress south of Cagny threatened the entire operation. The division command committed the 1st Welsh Guards infantry battalion to clear up the problem. The capture of Cagny, on the eastern edge of the Operation Goodwood “armored corridor,” still did not unhinge the German positions, as the defenders fell back a few hundred meters to the south. By late afternoon on the 19th, the Guards Armoured Division’s lack of progress south of Cagny threatened the entire operation. The division command committed the 1st Welsh Guards infantry battalion to clear up the problem.
Conclusion
The Welsh rooted out the SS defenders after several hours of intense combat, allowing the division’s tanks to move up through the ruins of Cagny. Heavy rain soon brought a close to the operation. Montgomery’s staff denied access to a representative from the War Cabinet in London, sent to determine the causes of the obvious failure. When the commander himself went to see the Prime Minster on the 24th he brought with him the story that Operation Goodwood had never been intended to force a breakthrough, but to inflict attritional losses and divert German reserves from the American sector, and therefore had been a great success.
Notes
The British attackers are primarily high morale Welsh Guards infantry, with a good array of support weapons and artillery, and a little specialized armor support (a flame-spewing Crocodile and a bomb-tossing AVRE). They’re facing the fanatic SS militia of the Hitler Youth, who are outnumbered and lack a lot of anti-tank capability, but hold a strong position.
And that’s all for Chapter Four. Next time, it’s Chapter Five.
You can order Liberation 1944 right here.
British Bulge Package
Liberation 1944 (Playbook ed)
Elsenborn Ridge
Britain's Battle of the Bulge
Retail Price: $190.97
Package Price: $150
Gold Club Price: $120
You can experience the British Bulge right here.
Sign up for our newsletter right here. Your info will never be sold or transferred; we'll just use it to update you on new games and new offers.
Mike Bennighof is president of Avalanche Press and holds a doctorate in history from Emory University. A Fulbright Scholar and NASA Journalist in Space finalist, he has published a great many books, games and articles on historical subjects; people are saying that some of them are actually good.
He lives in Birmingham, Alabama with his wife, three children, and new puppy. He misses his lizard-hunting Iron Dog, Leopold.
Daily Content includes no AI-generated content or third-party ads. We work hard to keep it that way, and that’s a lot of work. You can help us keep things that way with your gift through this link right here. |
