| Liberation 1944:
Scenario Preview, Part Three
By Mike Bennighof, Ph.D.
October 2024
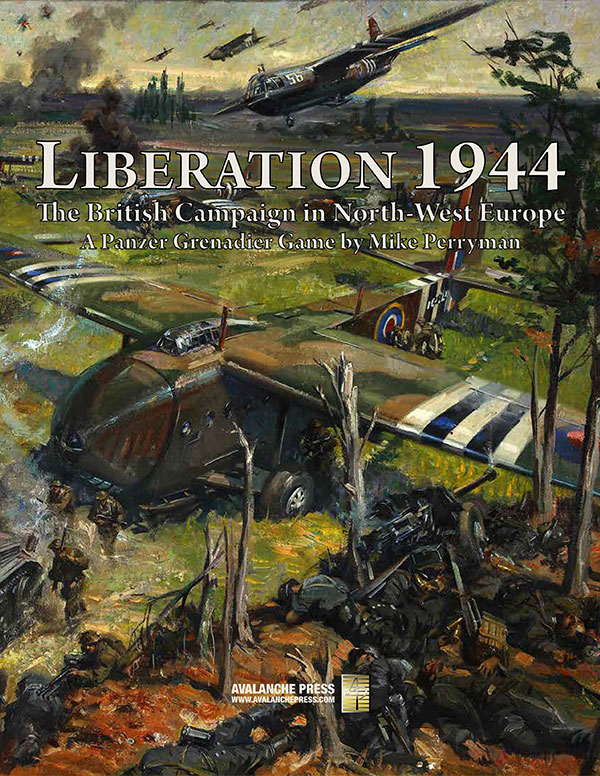 Once the British fought their way ashore from the beaches of Normandy, they faced two types of opposition: well-equipped and effective panzer divisions on the one hand, and on the other, garrison infantry divisions thrown together from the scrapings of the German manpower barrel. That’s the theme of Panzer Grenadier: Liberation 1944, as the British Army pushes its way into France. Once the British fought their way ashore from the beaches of Normandy, they faced two types of opposition: well-equipped and effective panzer divisions on the one hand, and on the other, garrison infantry divisions thrown together from the scrapings of the German manpower barrel. That’s the theme of Panzer Grenadier: Liberation 1944, as the British Army pushes its way into France.
If this was Britain’s Last Army, it was Germany’s second-to-last. The German garrison of France had years to prepare for the Allied invasion, building fortifications, training new recruits, and stockpiling weapons and munitions. Let’s continue our scenario preview, with the British slogging into the bocage country behind the Normandy beaches. You can see all of the previews here:
• Scenario Preview, Part One
• Scenario Preview, Part Two
• Scenario Preview, Part Three
• Scenario Preview, Part Four
• Scenario Preview, Part Five
• Scenario Preview, Part Six
• Scenario Preview, Part Seven
Chapter Three
Beyond Normandy
By the invasion’s fourth day, the situation had begun to clarify for both sides. Allied airpower had slowed the arrival of German reinforcements to the point that Rommel recognized the unlikelihood of an immediate counter-attack directly onto the beaches. Instead, he assigned Leo Geyr von Schweppenberg, titular but currently idle commander of Panzer Group West, the task of planning the operation.
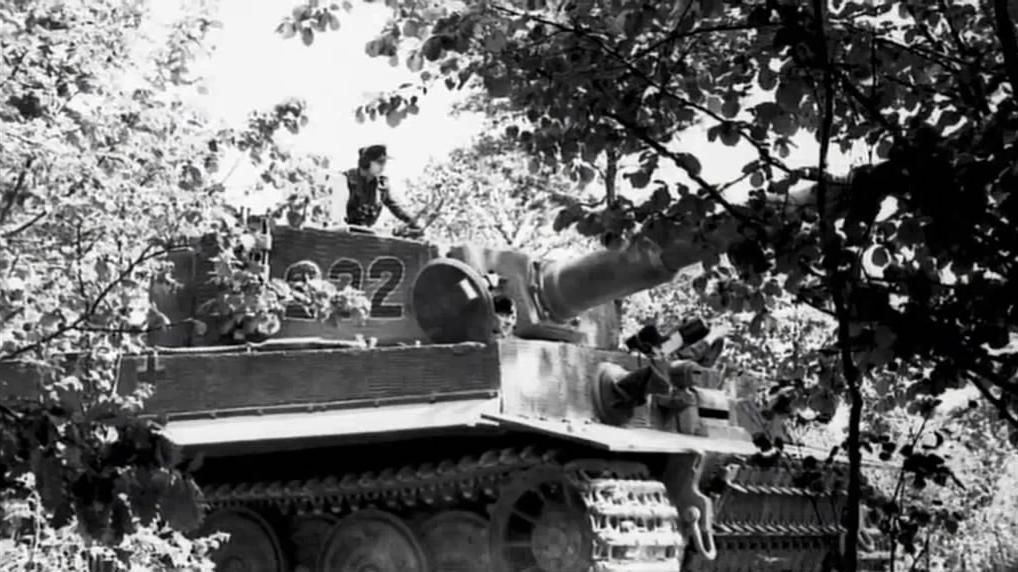
Nazi dreamboat Michael Wittman and his Tiger tank.
Thanks to Ultra intelligence intercepts, the Allies learned of Geyr’s mission and the location of his headquarters; British fighter-bombers shot up his newly-established headquarters, killing many staff officers, wounding Geyr and cancelling the offensive.
Meanwhile, the British had gotten an armoured division ashore and could begin their own advance into the hinterland. The Germans would be on the defensive for at least the near future.
Scenario Ten
Paras at Benouville
10 June 1944
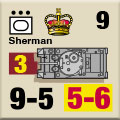 As long as the British remained east of the Orne River, they could launch attacks to expand their beachhead without having to factor in a river crossing. The advantages of this were obvious to both sides, so as the British rushed men to the beaches to expand the bridgehead, the Germans shuffled one of their “static” coast defense divisions a few kilometers southward from the beach defenses near Le Havre to drive the British back over the Orne. The 346th Infantry Division included over-aged Germans and unwilling ex-prisoners of war, but it did have its own contingent of assault guns. This motley collection formed up behind the strongpoint of Breville to drive the British back over the bridges at Benouville. As long as the British remained east of the Orne River, they could launch attacks to expand their beachhead without having to factor in a river crossing. The advantages of this were obvious to both sides, so as the British rushed men to the beaches to expand the bridgehead, the Germans shuffled one of their “static” coast defense divisions a few kilometers southward from the beach defenses near Le Havre to drive the British back over the Orne. The 346th Infantry Division included over-aged Germans and unwilling ex-prisoners of war, but it did have its own contingent of assault guns. This motley collection formed up behind the strongpoint of Breville to drive the British back over the bridges at Benouville.
Conclusion
The mission failed, but came surprisingly close to success. The “Germans” destroyed five of the Duplex-Drive Sherman tanks supporting the 7th Parachute Battalion, and the Paras only turned them back thanks to a bayonet charge by C Company of the 13th Parachute Battalion. The “static” division would continue to fight surprisingly well, but steadily be ground down over the weeks that followed.
Notes
The Paras are dug in and trying to hold their gains against a surprisingly non-crapulent German static division. There are about twice as many Germans as there are Paras, with plentiful artillery (both on- and off-board) and some armor. The Paras have some tanks helping them as well, plenty of leaders, and much better morale than the Germans.
Scenario Eleven
Enter the Desert Rats
10 June 1944
 The 7th “Desert Rats” Armoured Division, formed from the mobile elements of the pre-war garrison of Egypt, fought throughout the North African campaign and at Salerno in September 1943. Allied ground forces commander Bernard Montgomery requested the 7th Armoured to spearhead the invasion of North-West Europe, and it moved to Britain for re-equipment with the newest tanks and weapons. Montgomery expected great things of the veteran division. The 7th “Desert Rats” Armoured Division, formed from the mobile elements of the pre-war garrison of Egypt, fought throughout the North African campaign and at Salerno in September 1943. Allied ground forces commander Bernard Montgomery requested the 7th Armoured to spearhead the invasion of North-West Europe, and it moved to Britain for re-equipment with the newest tanks and weapons. Montgomery expected great things of the veteran division.
Conclusion
The Desert Rats had become early adopters of a flexible combined-arms structure, but as they made their first advance into the bocage country they led with their tanks on a narrow front and left the infantry behind. That allowed Panzer Lehr to concentrate their own armor and weaponry against the British spearhead, and the division showed virtually nonexistent progress despite extremely light casualties. When things went no better the following day the whispers of "burned out" became louder.
Notes
The Desert Rats face off against the Panzer Lehr. What could be better? Well, the Desert Rats could be for starters: this is not the same division that drove the Axis powers out of Africa. The Brits fling masses of Cromwells at the Germans, backed by a few Fireflies, with infantry support. The Germans are outnumbered and outgunned, but the “Springmaus” division is less than enthusiastic.
Scenario Twelve
The Green Howards
11 June 1944
 As the sun rose, Lt. Gen. Gerard Bucknall of XXX Corps ordered the 69th Infantry Brigade, part of the 50th (Northumbrian) Division, to attack the Cristot area as part of a large effort aimed at securing Tilly-sur-Seulles. The operation would kick off shortly after noon, but the division staff reacted very slowly and only at 1600 did the Green Howards step off. Probably not coincidentally, 50th Division was another of the long-serving formations brought from North Africa to lead the invasion of Normandy. As the sun rose, Lt. Gen. Gerard Bucknall of XXX Corps ordered the 69th Infantry Brigade, part of the 50th (Northumbrian) Division, to attack the Cristot area as part of a large effort aimed at securing Tilly-sur-Seulles. The operation would kick off shortly after noon, but the division staff reacted very slowly and only at 1600 did the Green Howards step off. Probably not coincidentally, 50th Division was another of the long-serving formations brought from North Africa to lead the invasion of Normandy.
Conclusion
The 6th Battalion of the Green Howards launched their attack through Audrieu and advanced steadily towards Cristot. On nearing the village, counterattacking Panther tanks destroyed seven of the supporting Shermans in an unequal fight. This left the infantry vulnerable to heavy small arms fire from Cristot, forcing them back to Audrieu. At the same time the 7th Battalion of the Green Howards suffered a rebuff while assaulting a wooded area just outside of Cristot. The 6th Battalion's War Diary put a brave face on a bad day saying: “Although the battalion suffered in that respect, the enemy was severely shaken by our attack and had many dead.”
Notes
It’s a fairly small battlefield, with the British on the attack. The British come to war with numbers, good leadership, high morale, and lots of artillery support. The Germans are outnumbered and outgunned, but they are insane fanatics: the teenaged grenadiers of the Hitler Youth Division.
Scenario Thirteen
Black Watch at Bréville
11 June 1944
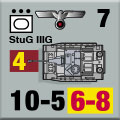 The surprisingly aggressive “Germans” of the static 346th Infantry Division could observe positions of the British 6th Airborne Division from Bréville, using the town as a base for a series of grinding, attritional attacks that kept the paras occupied and unable to advance. I Corps’ commander, Sir John Crocker, ordered the 51st (Highland) Division to send the 5th Black Watch Battalion to the 3rd Parachute Brigade and put an end to the German impertinence. The Highlanders arrived very early on the 11th and moved forward covered by a heavy artillery barrage. The surprisingly aggressive “Germans” of the static 346th Infantry Division could observe positions of the British 6th Airborne Division from Bréville, using the town as a base for a series of grinding, attritional attacks that kept the paras occupied and unable to advance. I Corps’ commander, Sir John Crocker, ordered the 51st (Highland) Division to send the 5th Black Watch Battalion to the 3rd Parachute Brigade and put an end to the German impertinence. The Highlanders arrived very early on the 11th and moved forward covered by a heavy artillery barrage.
Conclusion
The Highlanders encountered few problems until the barrage lifted as they neared Bréville. The Germans concentrated heavy fire on them as the attacker crossed a wide stretch of open ground, which quickly sent the Black Watch reeling backwards to Château St. Côme with over 200 casualities; one Black Watch company was almost wiped out. The Germans made a counter-attack of their own, and the Scots unleashed their own fury on them, inflicting equally heavy losses.
Notes
It’s just a small scenario, with the Black Watch and their high morale taking on those German static troops with morale that’s almost as good. But not quite as good, and the Highlanders also have plentiful leaders, artillery, and some air power. They’ll need all of those, as their mission is a tough one.
Daily Content includes no AI-generated content or third-party ads. We work hard to keep it that way, and that’s a lot of work. You can help us keep things that way with your gift through this link right here.
Scenario Fourteen
Château St. Côme
12 June 1944
 After the previous day’s defensive success, the German 346th Infantry Division, with additional tank support, attacked all along its front with the British 6th Airborne Division. A three-hour artillery barrage heralded the attack, and at mid-afternoon a reinforced grenadier battalion supported by armor marched forward to drive the remnants of the Black Watch and 9th Parachute Battalion from Château St. Côme. After the previous day’s defensive success, the German 346th Infantry Division, with additional tank support, attacked all along its front with the British 6th Airborne Division. A three-hour artillery barrage heralded the attack, and at mid-afternoon a reinforced grenadier battalion supported by armor marched forward to drive the remnants of the Black Watch and 9th Parachute Battalion from Château St. Côme.
Conclusion
To attack the Black Watch and the Paras with a mixed bag of old men and impressed Eastern Europeans would seem doomed from the outset, but it was a close run thing nonetheless. The 9th Parachute Battalion diary notes that the battalion sustained “fairly heavy casualties” from the attack, turning back the Germans by 2000. The diary also identifies the attackers’ armor as 6 Mark IV tanks (probably from 21st Panzer). The 5th Black Watch Battalion diary speaks of heavy casualties on both sides and a stunning lack of British antitank guns. The entry closes opining that “Never did the [Battalion] uphold better the tradition of the Black Watch.”
Notes
This time the Germans are on the attack, with a good-sized force well-supported by artillery but with little armored support. But the Paras and Black Watch aren’t outnumbered by much, even if they only have one anti-tank battery, and have their usual soaring morale.
Scenario Fifteen
Windy’s Attack
12 June 1944
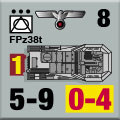 Major General Richard "Windy" Gale, commanding the 6th Airborne Division, tired of the constant enemy attacks launched from Bréville. With the outcome of the latest one still hanging in the balance, he deduced the enemy had shot their bolt. He augmented his reserve battalion with sixty Pathfinders from the 22nd Independent Parachute Company and a squadron of tanks and ordered them to attack as soon as possible. It took until about 2130 to get everything ready to go and by that time Company D from the 12th Devonshires had joined the mix. Major General Richard "Windy" Gale, commanding the 6th Airborne Division, tired of the constant enemy attacks launched from Bréville. With the outcome of the latest one still hanging in the balance, he deduced the enemy had shot their bolt. He augmented his reserve battalion with sixty Pathfinders from the 22nd Independent Parachute Company and a squadron of tanks and ordered them to attack as soon as possible. It took until about 2130 to get everything ready to go and by that time Company D from the 12th Devonshires had joined the mix.
Conclusion
During the opening artillery barrage a British round landed short and killed the 12th Battalion's commander and seriously wounded two others including Colonel Parker, the second-in-command. Parker chose to stay with the unit and direct the operation. The officers from the leading company fell quickly as well, but Sergeant Warcup kept Company C moving towards Bréville. The Germans stubbornly stood their ground until the Shermans worked their way around the village and poured fire into their flank. This suppression and destruction allowed the British foot to overwhelm the village but they paid a high cost. Only 15 men from C Company still stood. A Company lost their commander, Command Sergeant Major, and an entire platoon while the Devonshires fared little better. B Company came through more or less intact but that changed shortly as the 51st Highland Division’s artillery never received word to cancel their fire mission.
Notes
At least they didn’t call him Dorothy. This is a relatively small scenario, with about a reinforced battalion on each side. The Paras have some Shermans, engineers and line infantry helping them out, lots of artillery and that expected Parachute Regiment leadership and morale. The Germans seem awfully willing to fight for a fourth-line unit, and sport a plethora of support weapons and pretty good artillery of their own. It’s a night action, which means close combat.
Scenario Sixteen
Ste. Honorine
13 June 1944
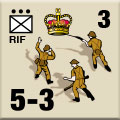 In their effort to lever the Germans out of Caen, the 153rd Infantry Brigade crossed the Orne River and worked their way to the northeast into an area known as the “Triangle.” Plans for the 13th called for the Cameron Highlanders to drive southward into the village of Ste. Honorine and on through Démouville, backed by armor support. But when the attack began, most of the supporting armor had already been sent westward to aid the hard-pressed Canadians, leaving the Highlanders on their own. In their effort to lever the Germans out of Caen, the 153rd Infantry Brigade crossed the Orne River and worked their way to the northeast into an area known as the “Triangle.” Plans for the 13th called for the Cameron Highlanders to drive southward into the village of Ste. Honorine and on through Démouville, backed by armor support. But when the attack began, most of the supporting armor had already been sent westward to aid the hard-pressed Canadians, leaving the Highlanders on their own.
Conclusion
The Scotsmen came under heavy fire as soon as they started advancing; it became heavier as they neared Ste. Honorine. This created a dilemma, as bypassing Ste. Honorine would leave their lines of communication exposed. When it became apparent the defenders could not be driven back, 51st Division called off the attack and the Scots dug in just north of the village.
Notes
This is a small scenario, just one board with a small German defending force of infantry backed by a battery of self-propelled guns facing an attack by Highlanders. As the intro notes they have no tank support, but they’re Highlanders and that means high morale and plenty of leaders. And while they have no conventional tanks, they do get a Crocodile: a Churchill tank fitted with a flamethrower.
Scenario Seventeen
Villers-Bocage
13 June 1944
.jpg) A successful attack by the U.S. 1st Infantry Division forced a gap in the German lines west of Caen, and the British 7th Armoured Division moved forward to exploit it. A combined-arms force met little resistance, turning the open flank of the German Panzer Lehr Division, until it reached the village of Villers-Bocage. A successful attack by the U.S. 1st Infantry Division forced a gap in the German lines west of Caen, and the British 7th Armoured Division moved forward to exploit it. A combined-arms force met little resistance, turning the open flank of the German Panzer Lehr Division, until it reached the village of Villers-Bocage.
Conclusion
Using a borrowed Tiger, SS militia tank commander Michael Wittman attacked the British column without waiting for the remaining German tanks to join him or any infantry support. After knocking out a Sherman Firefly, his tank shot up several command tanks, light tanks, and supply vehicles inside the town before an anti-tank gun disabled the Tiger (the first Tiger lost by the Germans in Normandy) and Wittman ran away on foot. When the rest of the German tanks arrived, the now-ready British knocked out all six Tigers of Wittman’s command and eight other German tanks.
Wittman, with his Aryan good looks, had already featured in a great deal of SS propaganda, touring German factories, and appearing in newsreels. Pushed by corps commander Sepp Dietrich, the SS propaganda machine quickly churned out a highly modified version of events. This tale, highlighted by a glossy photo spread in Signal magazine, credited all 22 British tanks destroyed at Villers-Bocage to Wittman. The British withdrew from Villers-Bocage, but not because of Wittman; their tanks had also heedlessly advanced without infantry to cover them in the dense terrain.
Wittman would become a post-war cult figure as, in the words of historian Steven Zaloga, “the hero of all Nazi fanboys.” His tanks destroyed many Allied machines, but he was no Lafayette Pool.
Notes
I suppose we had no choice but to include this scenario, an action made famous in wargame circles, with “research” often just regurgitated Nazi puffery. There’s no doubt that the British took heavy casualties here, but the fanboys usually leave out that they dealt a lot of pain in return.
And that’s all for Chapter Three. Next time, it’s Chapter Four.
You can order Liberation 1944 right here.
British Bulge Package
Liberation 1944 (Playbook ed)
Elsenborn Ridge
Britain's Battle of the Bulge
Retail Price: $190.97
Package Price: $150
Gold Club Price: $120
You can experience the British Bulge right here.
Sign up for our newsletter right here. Your info will never be sold or transferred; we'll just use it to update you on new games and new offers.
Mike Bennighof is president of Avalanche Press and holds a doctorate in history from Emory University. A Fulbright Scholar and NASA Journalist in Space finalist, he has published a great many books, games and articles on historical subjects; people are saying that some of them are actually good.
He lives in Birmingham, Alabama with his wife, three children, and new puppy. He misses his lizard-hunting Iron Dog, Leopold.
Daily Content includes no AI-generated content or third-party ads. We work hard to keep it that way, and that’s a lot of work. You can help us keep things that way with your gift through this link right here. |
