| Tactical Analysis in
Granada: The Fall of Islamic Spain
By J.R. Jarvinen
January 2024
 A player just starting to learn Granada:
The Fall of Islamic Spain might look
at the combat system and think, “Oh,
just another ‘roll a 10-sided die and
kill a unit on a hit mechanism.’” Well, at first blush this seems to be
true — but Granada employs
several unique features that if not fully
understood can seriously hurt a player’s
chance to win. This article details the combat
system as well as some idiosyncrasies that
add great flavor to this game, which covers
a little-known but fascinating period in Spanish
history. A player just starting to learn Granada:
The Fall of Islamic Spain might look
at the combat system and think, “Oh,
just another ‘roll a 10-sided die and
kill a unit on a hit mechanism.’” Well, at first blush this seems to be
true — but Granada employs
several unique features that if not fully
understood can seriously hurt a player’s
chance to win. This article details the combat
system as well as some idiosyncrasies that
add great flavor to this game, which covers
a little-known but fascinating period in Spanish
history.
Once you’ve mastered the
combat system, you must now apply the
rules to your actual battles. Several questions
must be addressed in virtually all battles.
First: To which units do I assign my Leader
bonuses, and from which units do I take my
losses? A casual player may just assign the
bonuses to his stronger units, hoping for
a better chance of a hit, and when taking
losses he may just start eliminating his weaker
units, holding the stronger ones for later
battles.
This may seem like a great strategy but
in some cases, but sometimes it is completely
wrong.
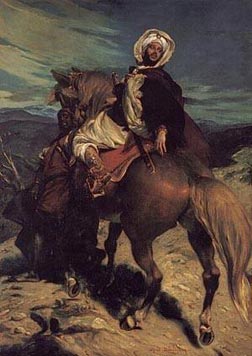
Boabdil Bids Farewell, by Alfred Dehodencq.
Boabdil should have done the math. |
Applying Leader Bonuses
In most cases, it does not matter where
you apply the Leader bonus. However, you would
definitely not apply it to a unit whose strength
would exceed 7 (such as an unreduced Siege Engine
whose strength is already at 7).
But why not make as many units as possible
attack at strength 7 to maximize your the
chances of hitting your opponent? Before addressing
this, we need to talk about “expectation.”
“Expectation” is defined (for
our game application) as the amount of hits
you would expect to make in one round of combat.
A single unit of strength 7 has an expectation
of 70%, or 0.7. In ten rounds, he would expect
to cause 7 hits. Similarly, a unit of strength
3 has only an expectation of 30%; he can expect
to cause 3 hits over ten rounds.
Let’s assume we have a combat force
of five 5-strength units and one 1-strength
unit. The expectation for an attack from this
force (without any modifiers) is (5 * 0.5)
+ (1 * 0.1) = 2.6. Thus, this force can expect
an average of 2.6 hits per each round.
Now let’s assume we have five leader
points to assign to this force. In our first
case, we will add them to the five 5-strength
units, making each of them effectively a 6-strength
unit. Our new expectation is 3.1 ([5 * 0.6]
+ [1 * 0.1]).
If instead we add all five points to the
1-strength unit, we still get the same expectation,
3.1 ([5 *. 0.5] + [6 * 0.1]).
In fact, it doesn’t matter where you
add these five points as long as none
of them are wasted by adding them to a unit
whose strength is already at 7. The
leader bonus simply adds a 10% bonus to your
expectation for each Leader point you use.
Because of the design of the various leaders,
the Spanish (assuming they use Ferdinand)
will almost always be adding 60% to their
expectation when attacking, and 50% when defending.
The Moors, assuming they use al-Zagul (and
don’t use Boabdil) will be adding 40%
to their attack and 50% to their defense.
In either case, this translates to about an
extra one-half hit per battle.
So it doesn’t really matter where
you put those leader points, right? Well,
wrong, sort of. You can’t affect the
final expectation by reassigning leader points,
but you can affect the distribution of how
many hits you get.
For example, assume you have 3 units each
at 4 strength, and you also have 3 leader
points to assign (I’ve picked smaller
groups to make the math a bit easier). In
Case 1, we will distribute the points such
that each unit gets one point. In Case 2 only
one unit gets the benefit of all the leader
bonuses. Table 1 illustrates the possible
results.
Table
1
Case
1
Three units: Each attacks at strength
4. |
0
hits |
12.5% |
1
hit |
37.5% |
2
hits |
37.5% |
3
hits |
12.5% |
| Expected
number of hits: 1.5 |
| |
Case
2
Three units: One attacks at strength
7, two attack at strength 4. |
0
hits |
10.8% |
1
hit |
39.6% |
2
hits |
38.4% |
3
hits |
11.2% |
| Expected
number of hits: 1.5 |
|
Each case has exactly the same expectation:
1.5 hits. It does not matter where you allocate
the Leader Points. But a subtle change has
happened in how these hits are distributed.
In Case 2 (we concentrated our Leader points
in one unit) we have now increased the chance
that exactly one unit will be hit at the cost
of decreasing the chances of hitting exactly
0, 2, or 3 units.
This shows that you have a better chance of
hitting the maximum number of units (in this
case, 3) if you spread your Leader points
about, but you also increase your chance of
killing 0 units. If you concentrate your Leader
points on one unit, you increase your chance
of hitting exactly one unit but decrease your
chances of hitting the maximum number of units.
The difference is small because of the few
units involved in the above example, but the
trend is important. Generally, I would recommend
spreading the Leader points as you give yourself
a better chance to kill more units. One exception
is if there is only one reduced defender left.
Then you are better off assigning the Leader
points to one unit to increase your chance
of a kill. After all, it doesn’t do
any good to get 3 hits if there is only one
step left in the defending stack.
In general, assign your Leader Bonus points
only to as many units as there are defending
units.

Courtyard of Granada. The prize to be
won. |
Elimination or Reduction
Now that we know how to efficiently assign
our Leader bonuses in attacks, how should
we allocate losses when attacked? You could
easily think that just reducing and then eliminating
the weakest units would the best strategy,
but again (surprisingly), that is not always
the case.
Unit Reduction
Each combat unit shares one interesting
feature in common: When reduced, they lose
exactly 2 strength points. A Santiago Cavalry
when reduced goes from 6 to 4; a lowly Moorish
infantry is reduced from 3 to 1.
You would think that by reducing all your weaker units first,
you would retain better attacking chances.
But this is not the case. Each hit effectively
reduces your attack capability by 20%. It
doesn’t matter if the hit is against
an elite cavalry or a weak infantry; your
expectation for the next round will be exactly
the same whether you reduce a unit of strength
7 or a unit of strength 3.
Why not then reduce the weakest units first
if it doesn’t matter? In most cases
that would be the recommendation. But other
factors should be considered, such as Unit
Reduction, Replacement and Rally.
Who Gets Reduced?
 Let’s
now assume you have two units defending, a
6-strength cavalry and a reduced 3-strength
cavalry. Your opponent rolls one hit; should
you reduce your 6-strength unit, or your 3-strength
unit? Let’s
now assume you have two units defending, a
6-strength cavalry and a reduced 3-strength
cavalry. Your opponent rolls one hit; should
you reduce your 6-strength unit, or your 3-strength
unit?
In this case you should reduce your 6-strength
unit as this only lowers your expectation
by 20%. If you eliminate the 3-strength, you
have lowered your expectation for the next
round by 30%.
An unreduced unit that takes a hit will lower
your expectation 20%. Therefore you should
almost always take reductions instead of eliminations
unless the unit to be reduced is 1-strength
infantry. A loss of this unit only reduces
your expectation by 10%.
Another reason to reduce instead of eliminate
units is because it keeps more units on the
board, and thus more dice, and thus a chance
to kill more units. Even though the expectation
might be the same, you can still affect the
distribution of results.
 For
example, assume you have a full 4-strength
unit and a reduced 2-strength unit, and must
apply one hit. Do you reduce your 4-strength
unit or eliminate the 2-strength unit? For
example, assume you have a full 4-strength
unit and a reduced 2-strength unit, and must
apply one hit. Do you reduce your 4-strength
unit or eliminate the 2-strength unit?
In either case, your expectation for the
next round will be 40%. However, if you do
the rather simple math, you will see that
with one 4-strength unit, you have a 40% chance
of killing one enemy unit and a 60% chance
of missing. However, if you have two 2-strength
units, you now have 4% chance of killing two
units, a 32% chance of killing exactly one
unit, and a 64% chance of missing. So you
have increased the chance of missing by a
bit, but also given yourself a small chance
of killing two units. Table 2 illustrates
this a bit more clearly:
Table
2
Chance
to kill |
| |
0
units |
1
unit |
2
units |
| One
4-strength unit |
60% |
40% |
0% |
| Two
2-strength units |
64% |
32% |
4% |
|
If there was only one reduced unit attacking
you, you might choose to eliminate one unit
and keep a non-reduced unit as this now gives
you a better chance to kill the one attacking
unit; the extra hit would be worthless if
attacking only one reduced unit.
In general, you should first reduce and then
kill your 3-strength infantry units, but there
are two exceptions to this rule. The first
is not to eliminate more 3-strength infantry
units than you would expect to get back during
you Winter Lull.
The second is a rather unusual case where
you have an awkward mix of units. Suppose
after several combat rounds you are left with
6 Leader Points, 1 full-strength cavalry worth
6, and 1 reduced infantry worth 1. The “rule”
tells us to eliminate the 1-strength infantry
— but this would then waste 5 of the
Leader Points. If instead you reduce the 6-strength
cavalry, you can now utilize all five points.
You have raised your expectation of hits for
the next round from 0.7 to 1.2, which is not
insignificant, especially when are you now
dealing with few units.
The Reinforcement Pool
Another very important part of unit reduction
is the composition of your reinforcement pool.
If you are the Moorish player and have 8 dead
infantry units, and no dead cavalry, you should
seriously consider reducing and eliminating
a cavalry unit before adding any more infantry
to the dead pool. At most, you can only get
seven infantry units back through reinforcement,
but you are guaranteed to get at least one
cavalry unit back. However, the ability to
rally troops (return a reduced unit to full
strength during the Winter Lull) complicates
this issue a bit more.
Is it better to eliminate a unit completely
or reduce two units and hope that you can
rally (return them to full strength) during
the Winter Lull?
The key to this dilemma is the player’s
average reinforcements, which can vary hugely
as a result of how many castles are controlled
(or not controlled). For example, the Spanish
infantry reinforcement can average as low
as 1.7 to as high as 3.3.
After a significant amount of analysis,
I found that a player should strive to keep
only a number of units in the dead pool equal
to the average he will get back during the
Reinforcement phase. This will allow the highest
rate of return when combining the Reinforcements
with Rallies.
Table 3 should help players decide how many
units players would ideally have in their
dead pool when Winter rolls around:
Table 3
Average
number of reinforcement units
based on Die Roll Modifier. |
| |
–2 |
–1 |
0 |
+1 |
+2 |
+3 |
| Spanish |
|
|
|
|
|
|
Infantry |
— |
2.2 |
2.5 |
2.8 |
3.1 |
3.3 |
Artillery |
— |
1.0 |
1.0 |
1.0 |
3.0 |
5.0 |
Cavalry |
— |
1.0 |
1.0 |
1.0 |
3.0 |
5.0 |
Naval |
— |
1.0 |
1.0 |
1.0 |
3.0 |
4.0 |
Alcantara |
— |
2.0 |
2.0 |
2.0 |
4.0 |
5.0 |
Santiago |
— |
3.0 |
3.0 |
3.0 |
5.0 |
6.0 |
Calatrava |
— |
2.0 |
2.0 |
2.0 |
4.0 |
5.0 |
| Moors |
|
|
|
|
|
|
Jund
Cav. |
1.6 |
1.9 |
2.3 |
2.7 |
3.1 |
— |
Jund
Inf. |
2.1 |
2.4 |
2.7 |
3.0 |
3.3 |
— |
Vol.
Inf. |
0.7 |
0.9 |
1.2 |
1.5 |
1.8 |
— |
Otto.
Inf. |
0.3 |
0.6 |
1.0 |
1.4 |
1.8 |
— |
Otto.
Nav. |
0.3 |
0.6 |
1.0 |
1.4 |
1.8 |
— |
|
Summary
Leaders Combat Modifiers: In general, assign your Leader Bonus points
only to as many units as there are defending
units.
Elimination versus Reduction:
• First, reduce and then eliminate as
many 3-strength infantry units as you would
expect to receive back during the Winter Lull
(see Table 3). Note exceptions discussed above.
• Then reduce all units before eliminating
any units.
• After all units have been reduced,
start eliminating the weakest units first
(again, only to the number you would expect
to receive back as reinforcements).
• Finally,
start eliminating the weakest units as you
take losses.
You can get some advice on how to make playing pieces right here.
You can download Granada right here.
It’s $29.99, but if you’re a Gold Club member, it’s free to you as part of the Golden Library (there’s no Gold Club discount or freeness through Wargame Vault).
Click here to join the Gold Club
See your Gold Club Insider newsletter for ordering information.
Golden Chipboard
 Ten (10) chipboard sheets, slightly thicker than the ones we use for game pieces, for use in pasting up your own counters from our downloadable games and expansions. Ten (10) chipboard sheets, slightly thicker than the ones we use for game pieces, for use in pasting up your own counters from our downloadable games and expansions.
You can order Golden Chipboard right here.
You can order sticky label paper here.
Sign up for our newsletter right here. Your info will never be sold or transferred; we'll just use it to update you on new games and new offers.
Mike Bennighof is president of Avalanche Press and holds a doctorate in history from Emory University. A Fulbright Scholar and NASA Journalist in Space finalist, he has published a great many books, games and articles on historical subjects; people are saying that some of them are actually good.
He lives in Birmingham, Alabama with his wife, three children, and his new puppy. He misses his Iron Dog, Leopold.
Want to keep Daily Content free of third-party ads? You can send us some love (and cash) through this link right here.
|