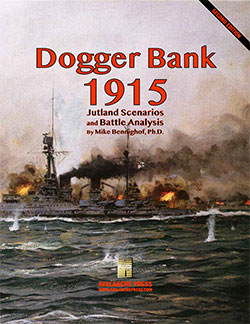
Jutland: Dogger Bank
Dogger Bank Scenarios
by Mike Bennighof, Ph.D.
February 2025
 Next to the Battle of Jutland, the Battle of Dogger Bank is the best-known naval battle of the First World War, and I long felt that our Great War at Sea: Jutland game didn’t give it enough attention. Next to the Battle of Jutland, the Battle of Dogger Bank is the best-known naval battle of the First World War, and I long felt that our Great War at Sea: Jutland game didn’t give it enough attention.
The battle arose from German paranoia. Several senior admirals became convinced that the scheming British had slipped radio-equipped spy ships amongst the fleet of fishing smacks working the Dogger Bank. That rich fishing ground in the middle of the North Sea lay athwart any German route to bombard the coast of Great Britain, lay mines or even invade. That the Germans were giving away their operations with poor radio security didn’t occur to the High Seas Fleet’s brain trust; the British had a very good cryptographic outfit, known as Room 40, but they didn’t need it to at least know when something was up in Wilhelmshaven – the Germans routinely gave away the game with sudden surges in radio traffic when the fleet went to sea.
We had a pair of Dogger Bank scenarios in the Jutland game (one operational scenario and one battle scenario) and they’re easily the weakest two in the set. We must have had Dogger Bank scenarios in the North Sea game we did back at the turn of the century but I don’t recall; my personal copy turns out to be a trade show display copy without a scenario book.
 I wrote the Jutland: Dogger Bank book mostly to redeem those two scenarios in the Jutland game. Rather than try to revise them, I just started over from scratch and gave the Dogger Bank battle the same treatment as the Scarborough Raid in Jutland: North Sea 1914. We start off, though, with a couple of preliminary operations that took place just before the Dogger Bank operation. The Germans sent a pair of light cruisers to lay a minefield off the Humber Estuary, while the British sent a probe into the Helgoland Bight, the waters just off the German North Sea coast. Neither met enemy interference, thanks to the heavy weather, but of course they could have so we play these out. The German probe would only have been met by the Harwich Force, which significantly out-gunned the mining force so this was a dangerous operation for not a lot of payoff. I wrote the Jutland: Dogger Bank book mostly to redeem those two scenarios in the Jutland game. Rather than try to revise them, I just started over from scratch and gave the Dogger Bank battle the same treatment as the Scarborough Raid in Jutland: North Sea 1914. We start off, though, with a couple of preliminary operations that took place just before the Dogger Bank operation. The Germans sent a pair of light cruisers to lay a minefield off the Humber Estuary, while the British sent a probe into the Helgoland Bight, the waters just off the German North Sea coast. Neither met enemy interference, thanks to the heavy weather, but of course they could have so we play these out. The German probe would only have been met by the Harwich Force, which significantly out-gunned the mining force so this was a dangerous operation for not a lot of payoff.
The British probe was designed to provoke a German reaction, but it took p[lace without the backing of the Grand Fleet’s battle squadrons. The Germans have the chance to isolate and crush the Battle Cruiser Fleet and its supporting pre-dreadnoughts, if they can find them in the soup. This was not the only time that sheer luck kept First Lord of the Admiralty Winston Churchill’s dilettante meddling from resulting in horrific disaster – this plan came from Churchill’s desk, and it overlooked informing Sir John Jellicoe at Scapa Flow.
And then we get to the main event. We have the full-length Dogger Bank operational scenario, another operational scenario picking up the action when the Germans and British first made contact out on the Dogger Bank, and a third operational scenario beginning from the point where the armored cruiser Blücher has been lost and battle cruiser Lion has been crippled, giving both players the choice of whether they wish to press on.
Each operational scenario is accompanied by at least one battle scenario. The full-length Dogger Bank scenario has the historical Dogger Bank battle, now corrected to involve all of the forces present and give the admirals the choice of pressing a torpedo attack. Those were removed during the Jutland game’s development, which turns it into a gunnery duel which is, granted, “more fun.” But that also means that neither player is making the same decisions as Sir David Beatty and Franz Hipper (who was not yet a “von”), who had to weigh the option of if or when to attack with their own destroyers, and how to counter the possibility of an enemy torpedo run.
During the pursuit of the German squadron, Hipper didn’t realize that Lion had been crippled – the zeppelin overhead which should have provided situational awareness that no admiral in history had ever before enjoyed provided only partial information that merely confirmed the mistaken impression that the British battle cruiser Tiger had exploded. So we have a pair of battle scenarios based on the situation as it lay, with Blücher sinking and Lion nearly so. Should the Germans attack Lion, and keep themselves in reach of the Grand Fleet? Should the British go after the damaged Seydlitz or protect Lion?
The late-stage operational scenario has its own battle scenario as well, and this one’s a nightmare for the Germans. As Hipper raced toward home and safety, High Seas Fleet commander Friedrich von Ingenohl brought out his battle fleet to shepherd them into port. But the commander had allowed his newest dreadnoughts to go into the Baltic Sea for gunnery exercises before the operation began – the Germans have only their pre-dreadnoughts and their two oldest (and least capable) classes of dreadnoughts available. Jellicoe enjoys the advantage in numbers, firepower and speed. It’s going to be the Black Day of the German Navy – and it was a fairly likely outcome, but in the actual event Jellicoe turned away rather than risk taking his precious heavy ships into the German minefields (and had he lost a couple of dreadnoughts without meeting the High Seas Fleet, he might be mentioned alongside Admiral Byng today).
And we wrap up with the Sondhaus Variations. Naval historian Lawrence Sondhaus was on my dissertation committee, so it’s kind of a requirement that I delve into his assertion (made in The Great War at Sea) that the Germans lost this battle before the war, when the battle cruiser Goeben wasn’t recalled from the Mediterranean to operate in the North Sea. I coupled that premise with an initial situation that matches the German estimate of the situation: the British start in port and not already at sea. And then I get to do what I couldn’t in my dissertation defense – tell Larry that he’s wrong and why.
So we get a pair of battle scenarios to go with it, that put the burden of action on the Germans (who have the superiority of force) and let the German player actually use the Goeben piece, which we included in the Jutland game and then never put in a scenario.
There’s a nasty phrase in academic history, “antiquarian.” In short, it implies a focus on details rather than causes and effects. Most wargames are not historical studies, much as they might carry the veneer, they’re just antiquarian lists of bicycle battalions. A lot of effort may have gone in to counting those battalions, and they may have the ultimate list of said battalions, but that’s not a historical study. That’s a laundry list.
These battle analysis books are very satisfying to write; “historical accuracy” is more than getting the number of bicycle battalions correct. We get to take a deeper dive into the background of each operation, the motivations of each side, the broader implications that drive operational decision-making. If you play these things for the history, this is written for you. And if you’re just in it for the laundry, well, we have all the ships in the right places, too.
You can order Jutland: Dogger Bank right here.
The Jutland Saga
 Jutland Second Edition Jutland Second Edition
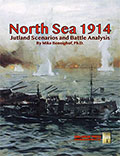
Jutland: North Sea 1914
Jutland: Dogger Bank
Jutland: Risk Fleet
Retail Price: $233.96
Package Price: $190.00
Gold Club Price: $152.00
You can order the Jutland Saga right here.
Please allow an extra three weeks for delivery.
Sign up for our newsletter right here. Your info will never be sold or transferred; we'll just use it to update you on new games and new offers.
Mike Bennighof is president of Avalanche Press and holds a doctorate in history from Emory University. A Fulbright Scholar and NASA Journalist in Space finalist, he has published a great many books, games and articles on historical subjects; people are saying that some of them are actually good.
He lives in Birmingham, Alabama with his wife and three children. His Iron Dog, Leopold, could swim very well.
Want to keep Daily Content free of third-party ads? You can send us some love (and cash) through this link right here.
|