| An Army at Dawn
Scenario Preview, Part Eight
By Mike Bennighof, Ph.D.
August 2024
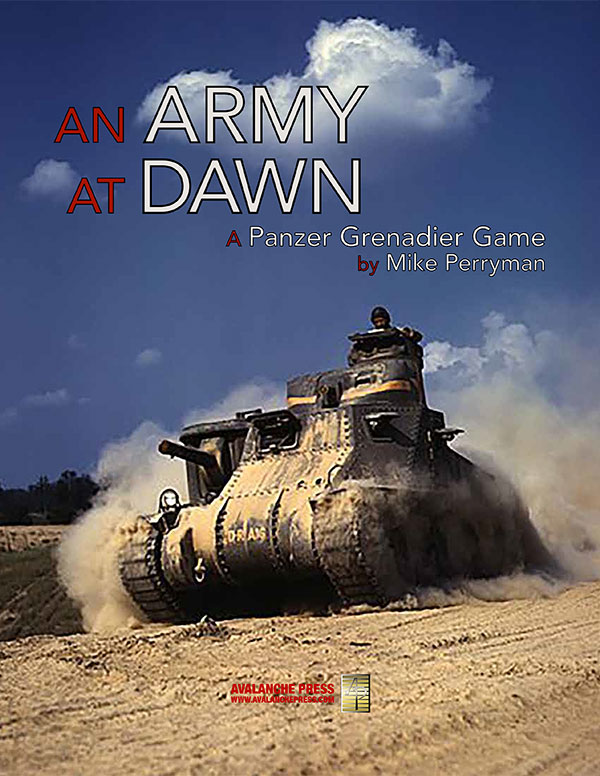 It’s the main even of Panzer Grenadier: An Army at Dawn: the February 1943 Battle of Kasserine Pass. This is where the U.S. Army met the Desert Fox, and came up tragically short. It resounds through the historiography of World War II, as the point where the Americans learned the stakes of failure on the modern battlefield. It’s the main even of Panzer Grenadier: An Army at Dawn: the February 1943 Battle of Kasserine Pass. This is where the U.S. Army met the Desert Fox, and came up tragically short. It resounds through the historiography of World War II, as the point where the Americans learned the stakes of failure on the modern battlefield.
The post-facto justifications are just that. Abraham Lincoln had learned the crucial lesson four score and one years earlier: sometimes, you have to fire people. Dwight Eisenhower didn’t start sacking failed commanders until after the Battle of Kasserine Pass. And finally, American performance improved.
On the other hand, Eisenhower himself probably should have been fired at that point, for his own culpability in keeping obvious weak links in his chain of command, and his penchant for micro-management. By keeping Ike, Franklin Roosevelt and George C. Marshall assured the ultimate destruction of the Nazi regime.
Let’s have a look at how our game addresses this crucible of victory, one where the players decide.
Chapter Nine
Kasserine Pass
 Field Marshal Erwin Rommel, commanding the remnants of the German-Italian Panzer Army in southern Tunisia, proposed an attack by most of the Axis mobile forces in Tunisia against the southern flank of the British First Army in northern Tunisia, through the Kasserine Pass. The Italian high command altered the plan to include the passes on either side of Kasserine, but retained the main thrust of the offensive, which would fall on the U.S. II Corps. Field Marshal Erwin Rommel, commanding the remnants of the German-Italian Panzer Army in southern Tunisia, proposed an attack by most of the Axis mobile forces in Tunisia against the southern flank of the British First Army in northern Tunisia, through the Kasserine Pass. The Italian high command altered the plan to include the passes on either side of Kasserine, but retained the main thrust of the offensive, which would fall on the U.S. II Corps.
Axis senior commanders in Tunisia had little respect for American fighting ability and their performance in Operation Spring Wind did nothing to change that. The Axis plan would drive in the Americans, capture their supply dumps, and force the British First Army to pull back across the border into Algeria.
Scenario Thirty
Djebel Semmama
19 February 1943
 The Italian supreme command had not yet accepted Rommel’s plan to attack in northern Tunisia when the field marshal sent his troops forward. Rommel considered that every iteration of the plan included an attack at Kasserine, and Comando Supremo had indicated that an attack would be approved. Kasserine Pass offered serious advantages to the defender but it lay close by the forward German positions and appeared not too well guarded. Before contesting the pass itself Djebel Semmama needed to be subdued. At 0930 the Americans saw the Germans step off toward their perch. The Italian supreme command had not yet accepted Rommel’s plan to attack in northern Tunisia when the field marshal sent his troops forward. Rommel considered that every iteration of the plan included an attack at Kasserine, and Comando Supremo had indicated that an attack would be approved. Kasserine Pass offered serious advantages to the defender but it lay close by the forward German positions and appeared not too well guarded. Before contesting the pass itself Djebel Semmama needed to be subdued. At 0930 the Americans saw the Germans step off toward their perch.
Conclusion
The German infantry managed to wrestle most of the eastern slope from the Americans of Task Force Stark. However, a tenacious defense of the rest of the hilltop kept the Americans on the summit at the end of the day. Stark certainly could have used the troops, tanks and artillery thrown away by Fredendall’s foolish deployment at Feriana two days previously.
Notes
A small scenario opens the main event chapter, with an infantry fight with the Germans trying to slog their way uphill and eject the Americans from their elevated positions. This is going to be a close-quarters bloodbath.
Scenario Thirty-One
Like a Stone Wall
19 February 1943
 While the Axis commands correctly identified the disarray in their opponents, they launched a confused attack, with commanders on the scene making their own adjustments to the plan sent from Rome, without notifying Comando Supremo or each other. On the Allied side, II Corps commander Lloyd Fredendall seemed determined to match their confusion single-handedly. He phoned Col. Alexander Stark and told him to drive immediately to Kasserine Pass and take command of the assorted troops there. “I want you to go to Kasserine right away,” Fredendall told the astonished colonel, “and pull a Stonewall Jackson.” Just what that gibberish meant was left up to Stark to decipher. While the Axis commands correctly identified the disarray in their opponents, they launched a confused attack, with commanders on the scene making their own adjustments to the plan sent from Rome, without notifying Comando Supremo or each other. On the Allied side, II Corps commander Lloyd Fredendall seemed determined to match their confusion single-handedly. He phoned Col. Alexander Stark and told him to drive immediately to Kasserine Pass and take command of the assorted troops there. “I want you to go to Kasserine right away,” Fredendall told the astonished colonel, “and pull a Stonewall Jackson.” Just what that gibberish meant was left up to Stark to decipher.
Conclusion
The Americans held the pass despite their poor organization and cohesion. After nightfall the commander of the British 26th Armored Brigade, Brigadier Charles Dunphie, visited the pass to see how to best employ his unit if needed. Stark assured him that everything “was well in hand.” Unfortunately, the colonel only had a vague idea where his units were deployed, and the brigadier encountered a fair number of German troops less than 400 yards from the command post. Fredendall refused Dunphie’s request to move his brigade forward and clear up the situation, despite Stark’s strong support for the British general’s idea.
Notes
The Germans begin their attack with an infantry-heavy force, trying to force a breach in American defenses that are strong in infantry, heavy weapons, and artillery, but weak in morale and leadership. Then things get really tough for the Americans, when a strong panzer force arrives to exploit the breakthrough (whether the breakthrough’s been made or not).
Scenario Thirty-Two
Gore Force
20 February 1943
 According to the U.S. Army’s official history of the campaign, “what happened during the night of 19-20 February cannot be clearly reconstructed from the records.” While American leaders couldn’t piece together the sequence of events, they knew the situation on Djebel Semmama had taken a definite turn for the worse. German infantry infiltrated in such numbers down the Thala road behind the hill, that British First Army headquarters ordered Lt. Col. A.C. Gore to take a small force from 26 Armoured Brigade and clean them out first thing in the morning. According to the U.S. Army’s official history of the campaign, “what happened during the night of 19-20 February cannot be clearly reconstructed from the records.” While American leaders couldn’t piece together the sequence of events, they knew the situation on Djebel Semmama had taken a definite turn for the worse. German infantry infiltrated in such numbers down the Thala road behind the hill, that British First Army headquarters ordered Lt. Col. A.C. Gore to take a small force from 26 Armoured Brigade and clean them out first thing in the morning.
Conclusion
Gore had too few troops to clear up the infiltrators, and the Germans methodically worked their way forward all morning. Rommel berated Col. Otto Menton of the Panzer Grenadier Regiment Afrika – a close personal friend and comrade from the First World War - for the slow progress, then sent in additional panzers and infantry. The forward Allied defenses quickly fell apart, trapping a Combat Command B armored infantry battalion attached to Gore Force on Djebel Semmama. The Germans quickly appropriated the halftracks the Americans left behind in the pass. Gore Force lost all their tanks while slowly being forced back, but maintained discipline and hampered all German efforts to get around them.
Notes
A tiny American force is holding the objective, but the cavalry coming to save them isn’t exactly overwhelming. The Germans can probably overrun the hilltop, but whether they can in turn hold out against the American reinforcements is unclear. That makes for a see-saw engagement and a very fun scenario.
Scenario Thirty-Three
Egged On
20 February 1943
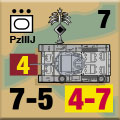 Rommel’s original plan had called for his troops to simply seal off the Kasserine Pass and make their breakthrough elsewhere; after the fighting on the 19th he decided prospects were actually better at Kasserine and shifted his point of attack accordingly. The pass would be opened by the Battle Group DAK, a division-sized collection of German Army, German Air Force and Italian Army troops with even a handful of German-officered Tunisian “volunteers.” Eager to push forward, Rommel visited group’s headquarters to egg the troops on. Rommel’s original plan had called for his troops to simply seal off the Kasserine Pass and make their breakthrough elsewhere; after the fighting on the 19th he decided prospects were actually better at Kasserine and shifted his point of attack accordingly. The pass would be opened by the Battle Group DAK, a division-sized collection of German Army, German Air Force and Italian Army troops with even a handful of German-officered Tunisian “volunteers.” Eager to push forward, Rommel visited group’s headquarters to egg the troops on.
Conclusion
The American engineers did what they could but did not possess infantry training, and allowed the Italian tanks to work between their positions. Once this happened, they could offer no effective defense and abandoned their part of the line in an uncoordinated withdrawal. The rest of Task Force Stark held on until 1700 hours when the Germans overran Colonel Stark’s headquarters. The colonel and his staff barely escaped, along with two army cameramen who wanted to get some action shots and received more than they bargained for. Stark’s counterpart, Colonel Luigi Bonfatti, died leading his Bersaglieri to victory. The Centauro Division’s tanks advanced five more miles without encountering any organized resistance before night forced them to laager.
Notes
German and Italian forces are trying to overrun an American position. The Americans have artillery and some tank support and some very strong geography on their side, but their morale’s just not a match for the Axis veterans. It’s a big scenario with a lot of tanks involved. This is a good thing.
Scenario Thirty-Four
Duel at Dawn
21 February 1943
 The Italian advance overran a huge number of American artillery pieces and supply vehicles, and finally came to a halt sometime before dawn – the Italians appear to have been slowed overnight by the sheer quantity of weapons, vehicles and supplies found intact and abandoned along the American retreat route. Just before dawn they encountered an American rearguard thrown out by 1st Armored Division’s Combat Command B. The Italian advance overran a huge number of American artillery pieces and supply vehicles, and finally came to a halt sometime before dawn – the Italians appear to have been slowed overnight by the sheer quantity of weapons, vehicles and supplies found intact and abandoned along the American retreat route. Just before dawn they encountered an American rearguard thrown out by 1st Armored Division’s Combat Command B.
Conclusion
Lloyd Fredendall, commander of the American II Corps, made a bad situation worse by suddenly placing all troops defending Kasserine pass under British Brigadier Charles Dunphie, then on the north side of Kasserine Pass with his 26 Armoured Brigade, but not sending Dunphie any additional communications equipment or personnel. That left Col. Paul M. Robinett and his Combat Command B adrift on the south side of the pass. Without orders or direction, the American rear guard offered brief resistance and then fell back to join the rest of Robinett’s troops.
Notes
The Italians are on the march, and a small American force can’t hope to stop them, they can only hope to delay them. With no Shermans on the board, the Italian tanks can fight something closer to their weight class, the M3 Stuart light tank.
Scenario Thirty-Five
Prepared Defense
21 February 1943
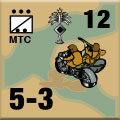 Misled by the disorderly American retreat, the German 33rd Reconnaissance Battalion reported shortly before noon that no substantial American forces occupied the area east of Djebel Hamra. Sensing opportunity, Rommel ordered his troops forward into the gap. Without waiting for air recon to confirm the situation, the Germans hurried forward to cover the eight miles to Djebel Hamra before the situation changed. Misled by the disorderly American retreat, the German 33rd Reconnaissance Battalion reported shortly before noon that no substantial American forces occupied the area east of Djebel Hamra. Sensing opportunity, Rommel ordered his troops forward into the gap. Without waiting for air recon to confirm the situation, the Germans hurried forward to cover the eight miles to Djebel Hamra before the situation changed.
Conclusion
The reports concerning an absence of American forces were wrong. A well-trained, well-concealed American force waited for them, covered by a large number of artillery pieces. When German panzers skillfully attempted to lure the emplaced American tanks into range of their famed 88’s the American wisely didn’t take the bait. By 1800 the Germans had absorbed enough punishment and called off the attack still four miles short of Djebel el Hamra.
Notes
It’s a pretty straightforward scenario: separate German and Italian forces enter the map and try to fight their way past an American defensive line. American morale has improved, and they do have some strong support weapons at their command.
Scenario Thirty-Six
A Terrible Price
22 February 1943
 During the night Battle Group DAK swung to the south in order to hit the Americans in the rear. Unfortunately for them Panzer Grenadier Regiment Afrika became disoriented in the dark and found themselves seven miles south of Djebel Hamra at dawn. Instead of striking the main American positions, the grenadiers routed the Americans on Hill 812 and captured a large number of artillery pieces and vehicles. This left them in a very exposed position, so the Germans threw the rest of the force at Djebel Hamra to distract the Americans. During the night Battle Group DAK swung to the south in order to hit the Americans in the rear. Unfortunately for them Panzer Grenadier Regiment Afrika became disoriented in the dark and found themselves seven miles south of Djebel Hamra at dawn. Instead of striking the main American positions, the grenadiers routed the Americans on Hill 812 and captured a large number of artillery pieces and vehicles. This left them in a very exposed position, so the Germans threw the rest of the force at Djebel Hamra to distract the Americans.
Conclusion
Karl Bülowius, commander of Panzer Army Afrika’s engineers, had temporarily taken command of the newly-renamed German-Italian Panzer Army and ordered Battle Group DAK’s Italian contingent to attack because, he said, their morale was close to breaking. Just how a futile attack would improve their morale, he did not say, and the Italians suffered enormous casualties from well-directed American artillery fire. The attack distracted the American attention from the grenadiers on Hill 812 before they broke off at noon.
Notes
The Italians must attack a strong American position, but hopefully they have better direction than that provided their historical counterparts by the engineer-general. Their German tank support is strong, morale is good and artillery nearly matches that of the Americans. This is going to be a closer-fought battle than the actual event.
Scenario Thirty-Seven
Denouement
22 February 1943
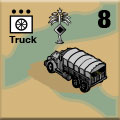 While Battle Group DAK conducted its futile attacks on Combat Command B, Terry de la Mesa Allen of the American 1st Infantry Division tried all through the morning to organize a counter-attack. Finally in the mid-afternoon he reached Col. Paul Robinett of 1st Armored Division’s Combat Command B and the Big Red One readied itself to attack Hill 812. Battle Group DAK had gained almost a full day to prepare itself. While Battle Group DAK conducted its futile attacks on Combat Command B, Terry de la Mesa Allen of the American 1st Infantry Division tried all through the morning to organize a counter-attack. Finally in the mid-afternoon he reached Col. Paul Robinett of 1st Armored Division’s Combat Command B and the Big Red One readied itself to attack Hill 812. Battle Group DAK had gained almost a full day to prepare itself.
Conclusion
Communications difficulties and the diversionary attack on Djebel Hamra held up the effort to rid Hill 812 of the grenadiers until 1600. Unlike earlier American attacks that lacked professionalism, this attack went in well-planned and -executed. Additional infantry and the tanks of Company G, 13th Armor Regiment from Combat Command B joined the attack. Perhaps more importantly the 1st Division’s Chief Artillery Officer really knew his craft, despite being known as Mr. Chips. II Corps allotted copious amounts of ammunition to the battle, and when the smoke cleared, all of the captured equipment and Hill 812 were back in American hands.
Notes
A swarming infantry fight on just one mapboard, with plenty of troops on both sides. The Americans have numbers on their side and a massive edge in artillery, plus an airplane.
And that’s it for Chapter Nine. Next time, we wrap things up with Chapter Ten.
You can order An Army at Dawn right here.
Big Red Package
An Army at Dawn
Big Red One
Retail Price: $92.98
Package Price: $85
Gold Club Price: $68
You can order the Big Red Package right here.
Sign up for our newsletter right here. Your info will never be sold or transferred; we'll just use it to update you on new games and new offers.
Mike Bennighof is president of Avalanche Press and holds a doctorate in history from Emory University. A Fulbright Scholar and NASA Journalist in Space finalist, he has published a great many books, games and articles on historical subjects; people are saying that some of them are actually good.
He lives in Birmingham, Alabama with his wife, three children, and new puppy. He misses his lizard-hunting Iron Dog, Leopold.
Daily Content includes no AI-generated content or third-party ads. We work hard to keep it that way, and that’s a lot of work. You can help us keep things that way with your gift through this link right here.
|
