Blood & Iron:
The Battles
by Mike Bennighof, Ph.D.
April 2020
 While I know that some of our fans would like to think that wargames are the equivalent of actual historical studies, what the academic trade calls monographs, that’s not really true. There are no footnotes, no peer review (bitter old rejected game designers ranting on the internet don’t count), and with a very few exceptions, no primary-source research. While I know that some of our fans would like to think that wargames are the equivalent of actual historical studies, what the academic trade calls monographs, that’s not really true. There are no footnotes, no peer review (bitter old rejected game designers ranting on the internet don’t count), and with a very few exceptions, no primary-source research.
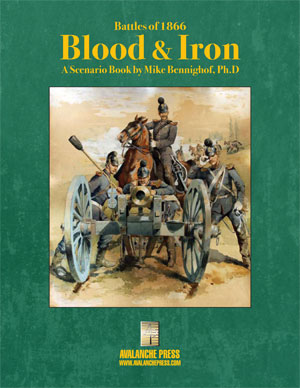
That said, in certain circumstances you can use a military history game to check out a counter-factual question. And that’s the basis of Battles of 1866: Blood & Iron. It’s an expansion book for Battles of 1866: Frontier Battles, and it studies the proposal by Bavarian chief of staff Ludwig von der Tann to send the Royal Bavarian Army into Bohemia, the main theater of war, to take up position on the Austrian left (western) flank. Through the six scenarios, we can study how the Bavarians might have fared fighting the Prussians in a full-scale field battle.
Let’s take a look at them (they’re numbered in the Frontier Battles sequence).
Scenario Fifteen
Jicin: The Arrival
 This scenario places the Saxons on the field and the Bavarians coming to reinforce them. It’s fairly hard on the German (Saxon-Bavarian) player; there are 13 German brigades in play against 10 Prussian ones once everyone’s deployed, but the Prussian brigades are enormously stronger than the small German formations (seven steps and a firepower of 10 at full strength, against five steps and usually a firepower of six). On the other hand, the Germans have a very strong position and it will be tough for the Prussians to winkle them out if the Bavarians can take their place in line in time. This scenario places the Saxons on the field and the Bavarians coming to reinforce them. It’s fairly hard on the German (Saxon-Bavarian) player; there are 13 German brigades in play against 10 Prussian ones once everyone’s deployed, but the Prussian brigades are enormously stronger than the small German formations (seven steps and a firepower of 10 at full strength, against five steps and usually a firepower of six). On the other hand, the Germans have a very strong position and it will be tough for the Prussians to winkle them out if the Bavarians can take their place in line in time.
In terms of history, this is a likely form the battle would have taken had von der Tann convinced the Austrians to accept Bavarian aid. The Saxons had been pressed back from their own country well to the north-west of Jicin and would have expected to fight on this flank of the Allied armies.
The Bavarians had based their proposal on the concept of freeing the Austrian I Corps, stationed at Prague in peacetime, to march east and join the main Austrian army while they took its place. The Austrian Kalik Brigade was not part of I Corps during peacetime, but had served as the garrison of Holstein and been evacuated just before the war broke out, making their way to Prague after a series of close escapes. The brigade probably would not have arrived in time to join the eastward march, and would have more likely remained to fight alongside the Saxons.
Scenario Sixteen
Jicin: Clash of Princes
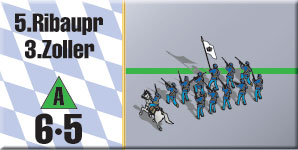 In this scenario, the Bavarians have reached the field before the Prussians and taken up their positions in the Jicin perimeter. It’s similar to the historical Jicin scenario from Frontier Battles, except that the Saxons are on the left wing (held by the Austrians historically) and the Bavarians on the right. As in the previous scenario, the Saxons also have an attached Austrian brigade with some supporting arms. In this scenario, the Bavarians have reached the field before the Prussians and taken up their positions in the Jicin perimeter. It’s similar to the historical Jicin scenario from Frontier Battles, except that the Saxons are on the left wing (held by the Austrians historically) and the Bavarians on the right. As in the previous scenario, the Saxons also have an attached Austrian brigade with some supporting arms.
At first glance the German side comes off somewhat better than in the historical scenario, trading four Austrian brigades (28 steps, 32 firepower) for nine Bavarian brigades (44 steps, 53 firepower). On the defensive, they’ll feel the loss of the superbly-equipped and -crewed Austrian artillery batteries; the Bavarian smoothbores lack the range and punch of the Austrian rifled guns. And the Prussians have picked up an additional division of two brigades (14 steps, 20 firepower) which offsets the German gains.
This is the battle von der Tann expected, and volunteered his army to fight.
Scenario Seventeen
Jicin: Well Met
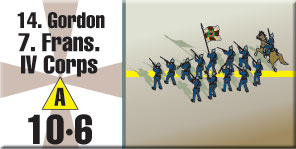 This scenario looks at another different timing of the Royal Bavarian Army’s arrival on the Jicin battlefield, putting them there just as the Prussians are themselves marching in from the west to create a meeting engagement. The Bavarians are at their full strength of nine brigades, and have the assistance of the Austrian 1st Light Cavalry Division, a powerful force for its size (the only Austrian units in Frontier Battles armed with breech-loading rifles). First Light Cavalry Division has three brigades, but each has the firepower of half of an Austrian infantry brigade (those horses take up a lot of space). This scenario looks at another different timing of the Royal Bavarian Army’s arrival on the Jicin battlefield, putting them there just as the Prussians are themselves marching in from the west to create a meeting engagement. The Bavarians are at their full strength of nine brigades, and have the assistance of the Austrian 1st Light Cavalry Division, a powerful force for its size (the only Austrian units in Frontier Battles armed with breech-loading rifles). First Light Cavalry Division has three brigades, but each has the firepower of half of an Austrian infantry brigade (those horses take up a lot of space).
The Prussians are a little bit weaker here, with only three divisions (six brigades) in the field, making the odds about even for this fight.
The Saxons do not appear. Saxon Crown Prince Albert came away from the war with an enhanced and mostly unearned military reputation. In the actual events, he first allowed his corps to wander off to the south of the Jicin battlefield when it was obvious to the Austrian command that the Prussian First Army would have to come down the roads from Münchengrätz through Jicin on their way to link up with the Second Army. When the Saxons did finally arrive, it was Albert who insisted on retreating based on outdated orders, even though the battle’s outcome remained in doubt.
In terms of game scenarios, then, it’s about equally likely that the Bavarians would have found the Saxons in position at Jicin (as in the previous scenarios) as it is that this scenario would have been the case, with the Saxons having drifted away to the south as they actually did.
Scenario Eighteen
Jicin: German Armies
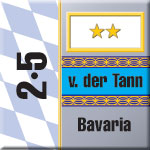 Another option for Ludwig von Benedek, Austrian commander in the northern theater, would have been to simply add the Bavarian strength to that of the forces he had arrayed on his western flank: the Saxons, Austrian I Corps and Austrian 1st Light Cavalry Division. Another option for Ludwig von Benedek, Austrian commander in the northern theater, would have been to simply add the Bavarian strength to that of the forces he had arrayed on his western flank: the Saxons, Austrian I Corps and Austrian 1st Light Cavalry Division.
With an army-sized command, he also had the option to appoint a more competent commander. Ludwig von Gablenz was himself a Saxon, son of a Saxon general, and had proven an adept diplomat when commanding Austrian forces in the 1864 war with Denmark. That appointment would have given the Bavarians an excuse to replace the elderly Karl with von der Tann, a general junior to Gablenz.
These additions give the Austro-Allied side a very strong position, and it’s going to be hard on the Prussians to break through. While their victory conditions are thereby somewhat less onerous than in previous scenarios, they’re still tough – the Prussian Army did not come here to win a victory based on style points.
In historical terms, this is the sort of garrison Leopold Gondrecourt, ad latus commander of the Austrian I Corps, believed necessary to hold the line: three full-strength corps, not the two with which the battle was actually fought. Gondrecourt laid out the Austro-Saxon defenses in the actual battle, as his boss Eduard Clam-Gallas was too intoxicated to participate in planning. Benedek made no plans to use the Bavarians in Bohemia, and so it’s definitely conceivable that he would have simply used them to fulfill Gondrecourt’s request (made in the name of Clam-Gallas) to add another corps to the defense.
This scenario, when played after “The Battle” scenario from Frontier Battles, shows that Gondrecourt was likely correct. With two corps, the Austro-Saxon line has multiple weak points and is subject to being outflanked at its north-eastern end. A third corps, even one composed of relatively weak Bavarian brigades, makes an enormous difference.
Scenario Nineteen
Counter Attack
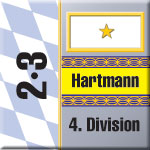 In this scenario, the Bavarians arrive on the field of the morning of the second day of battle at Jicin. The Austro-Saxons have been pushed back with some losses, though they are not yet seriously hurt. The Prussians have gained some ground but the issue remains in doubt. In this scenario, the Bavarians arrive on the field of the morning of the second day of battle at Jicin. The Austro-Saxons have been pushed back with some losses, though they are not yet seriously hurt. The Prussians have gained some ground but the issue remains in doubt.
This battle never happened in any form: Crown Prince Albert ordered a retreat over the furious objections of I Corps’ Austrian command staff. Yet this battle easily could have happened, and would have without the Crown Prince’s equivocation. He might have received firmer orders to stand and fight had the Bavarians been on their way from the south to reinforce the Allied army, or he might have been less willing to appear meek, bringing on the battle seen in this scenario.
Like the preceding scenarios, this situation hinges on the question of when the Bavarians might have arrived at Jicin. In the actual campaign waged by the Royal Bavarian Army in western Germany, they showed a noted sluggishness in getting their column on the road, and on at least one occasion halted a march so that the troops could have the daily beer ration guaranteed every Bavarian soldier under the kingdom’s laws.
Scenario Twenty
Grand Battle
 Finally, this scenario places the Bavarians on the attack along with a large force of Austrians plus the Saxons, with the Prussians on the defensive. The Prussians have the needle gun, though the Bavarians (as well as the Saxons) are not required to press insane bayonet attacks into the face of the Prussian defenses. The Allied armies have a sizable mark to hit in order to win the game, but they do have good leadership and a great deal of force with which to accomplish this. Finally, this scenario places the Bavarians on the attack along with a large force of Austrians plus the Saxons, with the Prussians on the defensive. The Prussians have the needle gun, though the Bavarians (as well as the Saxons) are not required to press insane bayonet attacks into the face of the Prussian defenses. The Allied armies have a sizable mark to hit in order to win the game, but they do have good leadership and a great deal of force with which to accomplish this.
Ludwig von Benedek, the Austrian commander-in-chief in the northern theater, spoke of crushing the Prussians at Jicin but like other Austrian army commanders relied on the operational maxims of the great Josef Graf Radetzky, which drew in turn on those laid down by Leopold Daun during the Seven Years’ War: seize a favorable position, allow the enemy to exhaust himself against it, then finish him with a counter-attack from a large, fresh reserve.
This sort of battle would have been a departure from Austrian norms, and for that reason Benedek likely would have hesitated to actually order this attack. But his staff did consider the option, and with Bavarian numbers added into their calculations it would have been more attractive than it proved in reality.
Click here to order Battles of 1866: Blood & Iron right now.
Sign up for our newsletter right here. Your info will never be sold or transferred; we'll just use it to update you on new games and new offers.
Mike Bennighof is president of Avalanche Press and holds a doctorate in history from Emory University. A Fulbright Scholar and NASA Journalist in Space finalist, he has published over 100 books, games and articles on historical subjects.
He lives in Birmingham, Alabama with his wife, three children and his dog, Leopold.
|
