Chickamauga
& Chattanooga
Scenario Eight:
Assault on Chattanooga
By Mike Bennighof, Ph.D.
February 2016
Following his bloody victory at Chickamauga,
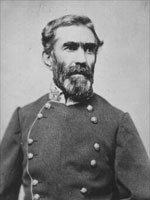
Confederate Gen. Braxton Bragg appears to
have believed the Union would abandon Chattanooga
without a fight and retreat toward Nashville.
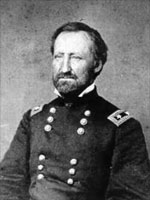
The Union commander, William S. Rosecrans,
was personally shattered by the defeat and
Bragg’s assumption was not without foundation.

Bragg fumbled. |

Rosecrans recovered. |
But contrary to expectations, the Union Army
of the Cumberland stood at Chattanooga and
furiously began fortifying the city to withstand
a Confederate attack. Bragg’s Army of
Tennessee arrived two days after the Union
forces and occupied the heights south of town
without opposition, and settled into what
contemporaries termed the “Siege of
Chattanooga.”
The siege wasn’t much of a siege,
as the Confederates were unable to cut all
communications and the Federals failed to
starve. Brig. Gen. William F. “Baldy”
Smith, demoted after clashes with his superior
Ambrose Burnside in Virginia and transferred
to the Western theater, organized an efficient
supply system. Using the Tennessee River and
a mule route, the “cracker line”
not only fed the Army of the Cumberland, it
brought in weapons, ammunition and reinforcements
to bring it back up to strength. The besieging
force had an equally difficult time feeding
itself and had fewer reinforcements on which
to draw, and so over time the relative balance
of strength turned in the Union’s favor.
Some Confederate generals counseled Bragg to launch an immediate
assault on Chattanooga after the victory at
Chickamauga. Unsure his army was up to the
task, Bragg did not want to rack up more casualties
for an objective he believed could be won
without fighting.
With the hindsight of history, we can see
that perhaps Bragg should have rolled the
dice. Or maybe not. This scenario lets us
explore the alternatives.
Map
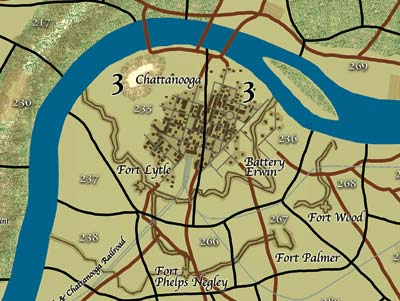
Use the Chattanooga map.

Victory Conditions
Union Decisive Victory: Inflict
at least 25 losses on the Confederates, while
suffering no more than 15 losses yourself.
No Confederate unit occupies an area in or
adjacent to Chattanooga or area 238.
Union Minor Victory: No Confederate unit occupies an area in or
adjacent to Chattanooga or area 238.
Confederate Minor Victory: Inflict
at least 20 losses on the Union while suffering
no more than 10 losses yourself.
Confederate Decisive Victory: Suffer no more than 20 losses.
Confederate units occupy or were the last
to pass through all areas in or adjacent to
Chattanooga plus area 238.
Any other result is a draw.
Historical Result
None.
Union Setup
In or adjacent to area 265: A. McCook (XX Corps), 1/XX infantry
(D), 1/XX artillery (B), 2/XX infantry (E),
2/XX artillery (B), 3/XX infantry (E), 3/20
artillery
In or adjacent to area 279: Thomas, 1/XIV infantry (F), 1/XIV artillery,
2a/XIV infantry (E), 2/XIV artillery (B),
3a/XIV infantry (F), 3 artillery (B)
In or adjacent to Chattanooga: Rosecrans, Army of the Cumberland
HQ, Wilder mounted infantry (B), Wilder artillery,
Crittenden, 1/XXI infantry (C), 1/XXI artillery
(B), 2/XXI infantry (E), 2/XXI artillery (B),
3/XXI infantry (D), 3/XXI artillery (B), 2b/IV
infantry (C), 2a/IV artillery
In any Union-occupied area: E. McCook (1/Cav), Crook, 1/1/Cav,
2/1/Cav, 3/1/Cav, 1/2/Cav, 2/2/Cav, Cav artillery
Union artillery ammunition: 30
Union reinforcements: None
Confederate Setup
Area 288: Longstreet
(I Corps), 1a/I infantry (E), 1a/I artillery,
2a/I infantry (C), 2a/I artillery, 3/I infantry
(D), 3/I artillery, Buckner (V Corps), 1/V
infantry (F), 2a/V infantry (B), 2b/V infantry
(B), 2a/V artillery, 2b/V artillery
Area 291: Bragg,
Army of Tennessee HQ, Reserve artillery, Hill
(III Corps), 1/III infantry (B), 1/III artillery,
2/III infantry (B), 2/III artillery,
Area 332: Polk,
1a/II infantry (D), 1a/II artillery, 1b/II
infantry (D), 1b/II artillery, 2a/II infantry
(B), 2a/II artillery, 2b/II infantry (C),
2c/II artillery
At any Confederate entry area: Forrest, Wheeler, 1/M/Wheeler, 2/M/Wheeler,
1/W/Wheeler, 2/W/Wheeler, W artillery, 1/P/Forrest
(C), 2/P/Forrest, 1/A/Forrest (B), 2/A/Forrest,
Forrest artillery
Confederate reinforcements: None
Confederate artillery ammunition: 30
Length of Battle
12 turns, lasting from 0700 to 1800, September
22nd, 1863.
Scenario Special Rules
1. In addition to his own units, Thomas may
activate units from any other corps if he
is stacked with or adjacent to them.
2. Reduce Rosecrans’ and Bragg’s
ratings both to 3-0-3.
3. Confederate reinforcements may be held
off the map to enter on a later turn.
Assault Chattanooga! Order Chickamauga & Chattanooga right now!
Mike Bennighof is president of Avalanche Press and holds a doctorate in history from Emory University. A Fulbright Scholar and award-winning journalist, he has published over 100 books, games and articles on historical subjects.
He lives in Birmingham, Alabama with his wife, three children and his dog, Leopold. Leopold has a very fine nose.
|
